Struggling with editing your wedding photos efficiently in Lightroom? Watch this tutorial from Community Manager Chad Winstead on five common wedding photo editing mistakes and how to fix them with some help from our Visual Flow Presets. For more in-depth Lightroom tutorials, make sure you subscribe to our YouTube page!
1. Cropping Incorrectly
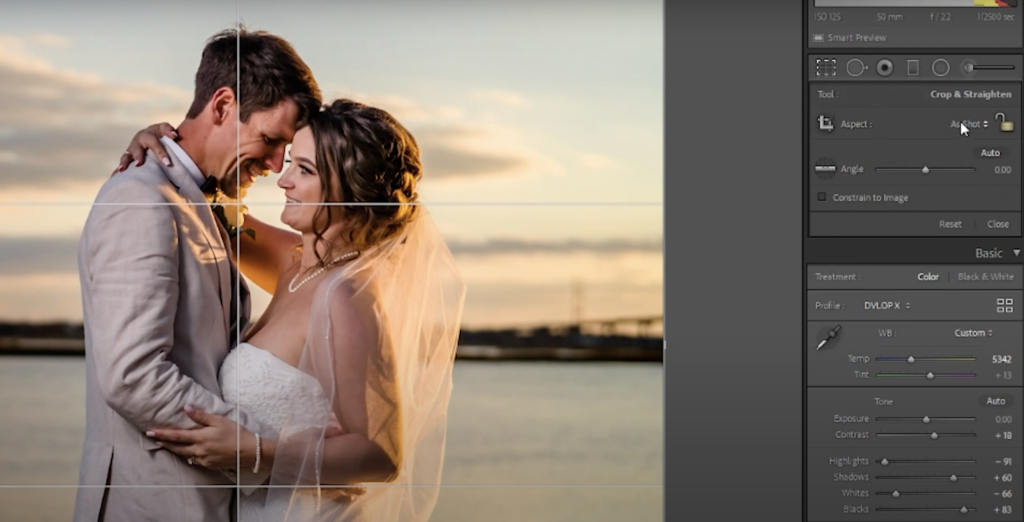
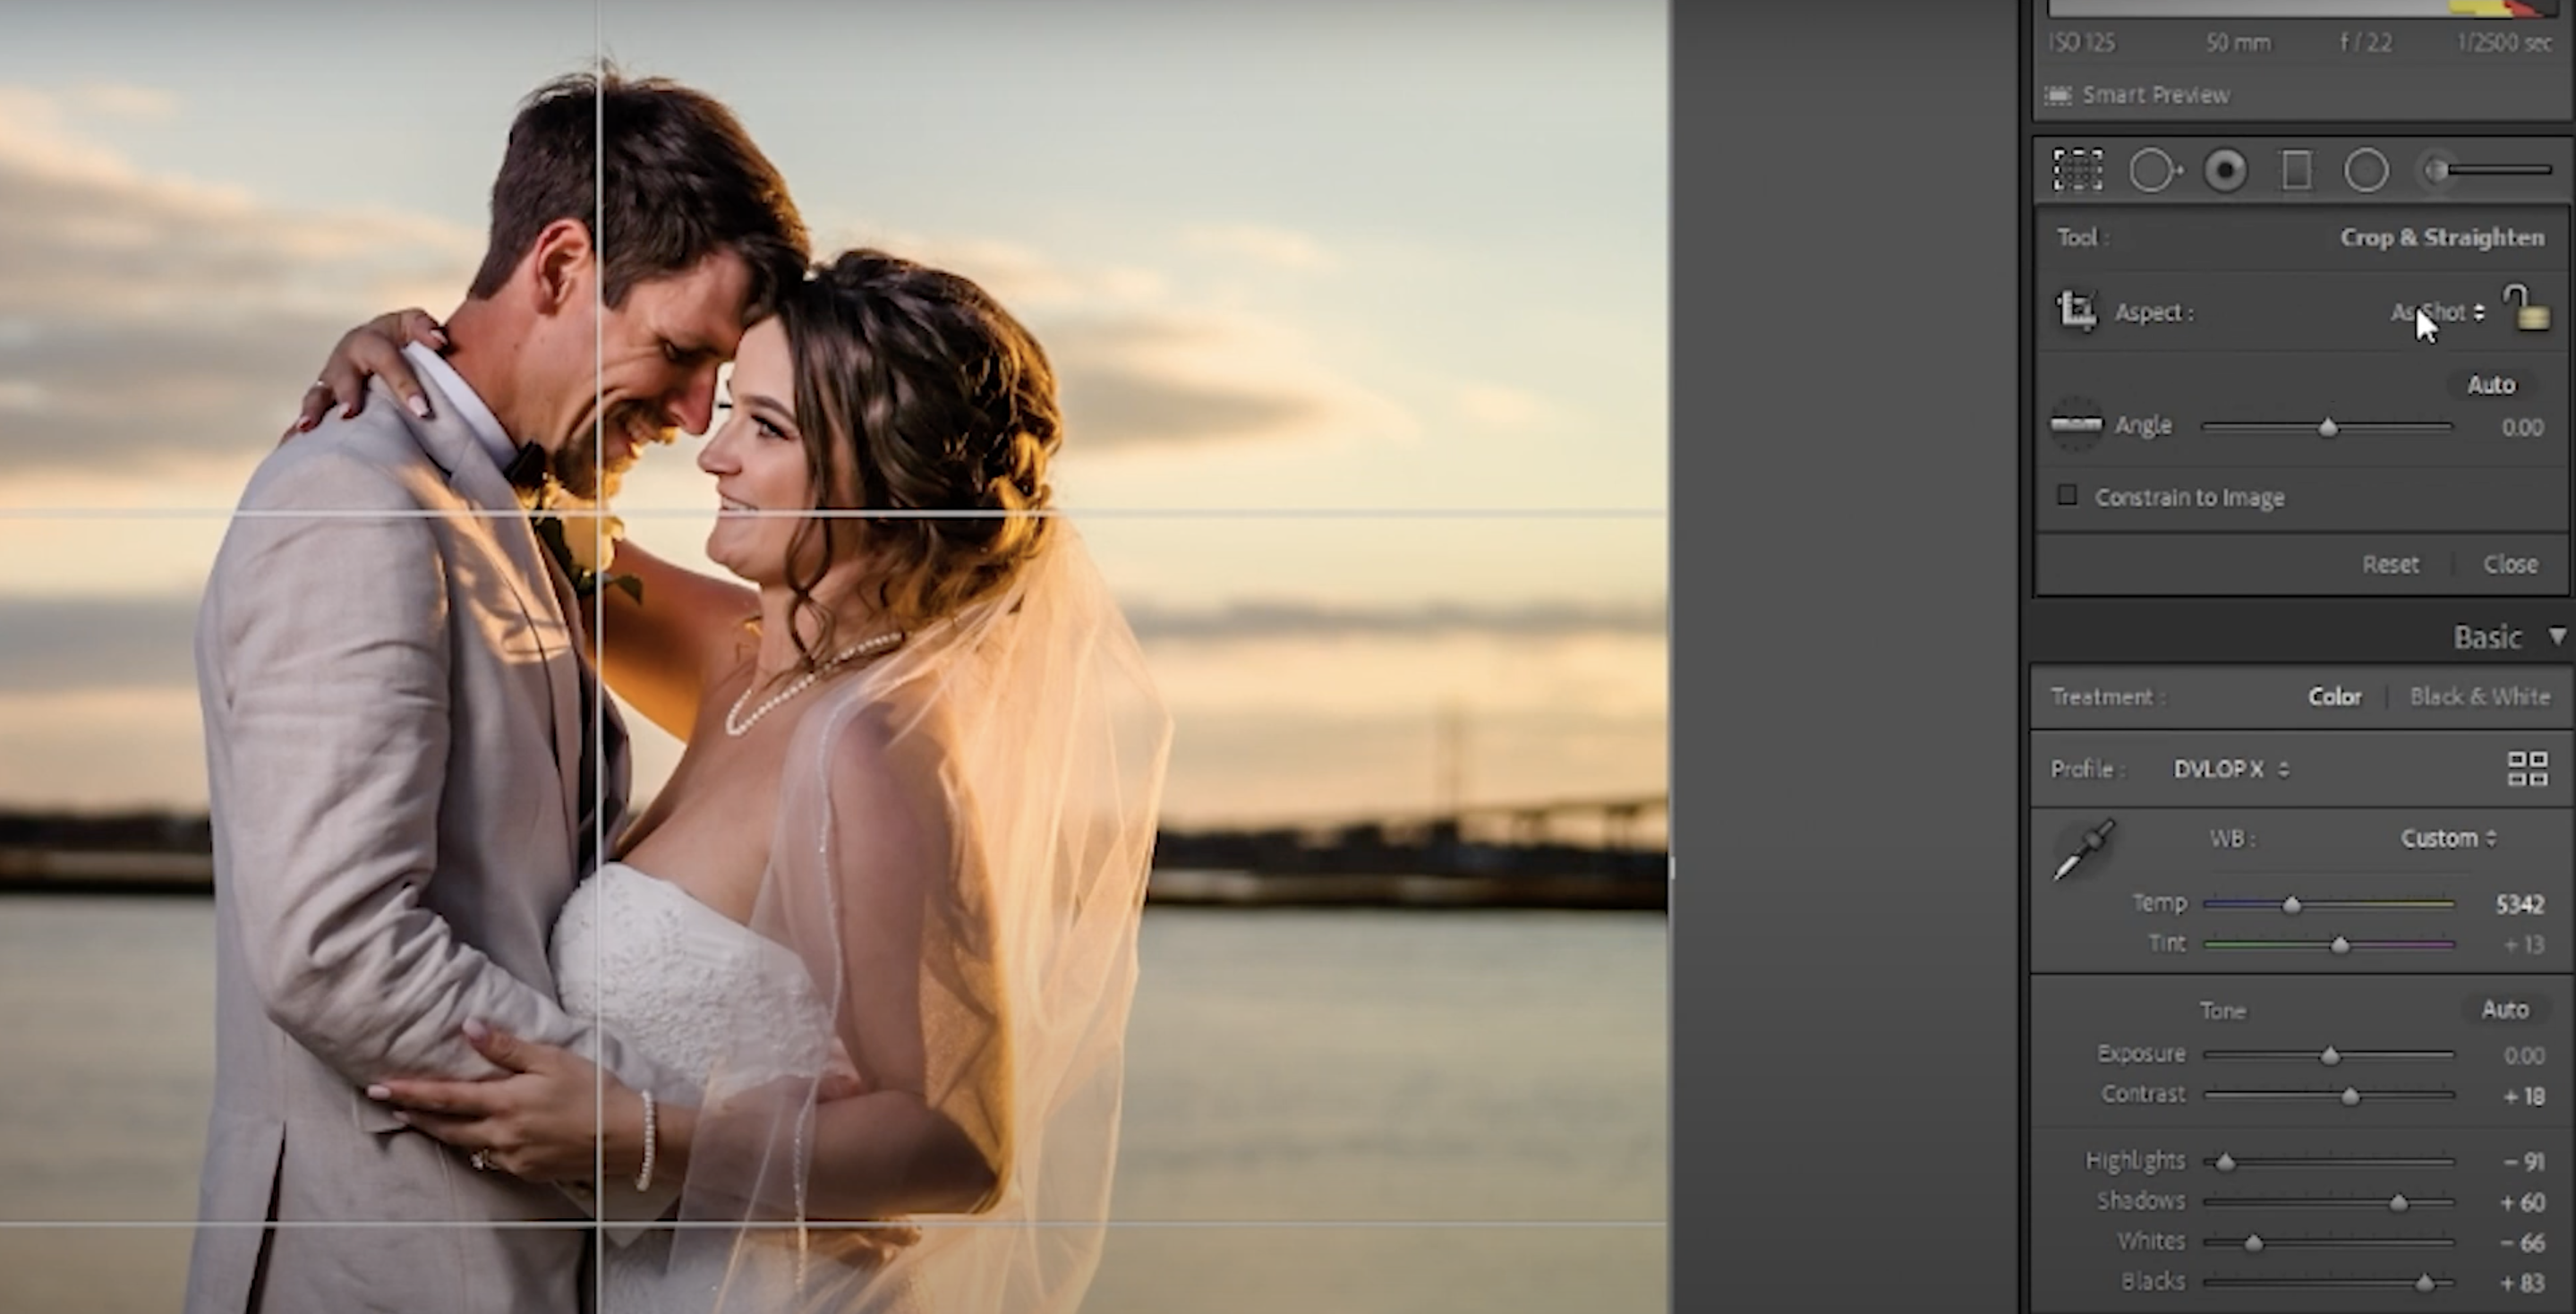
There’s a couple of mistakes that can be made here. One common cropping mistake revolves around the Aspect Ratio. You want to be consistent with your cropping so all the images will display and print properly. Check the box and use the lock icon to always maintain the same Aspect Ratio as originally shot. Cropping has a huge effect on how your image is seen by the viewer. Is your horizon crooked? Well, check out the Straighten tool or even the Auto-Straighten tool. There are also distractions in the background that could easily be cropped out. One of my favorite tricks is to flip the image upside down and see where your eyes go. If your eye goes straight towards your subject, then great, but if you notice any distractions try and crop them out.
2. Don’t Over Edit Your Images
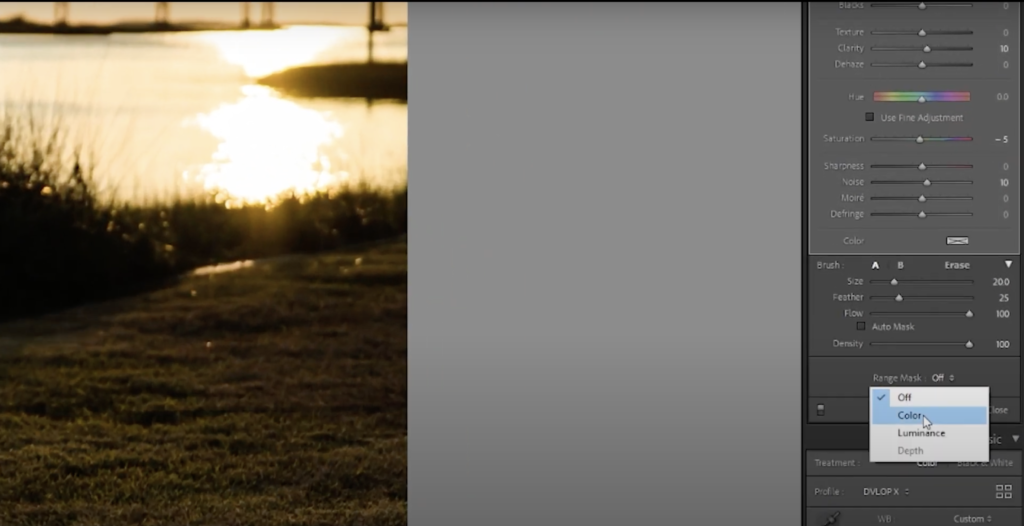
Watch for halo-ing or artifacts appearing in your photo. There is such thing as too many edits. I like to see how far I can push my image until it looks to be too much and then I start to dial it back. If you start to see those artifacts or halo-ing in your image you probably took it too far. A common mistake with over-editing is when people are using the Brush tool too loosely. This can be avoided by simply adjusting the feather down to 25 or so and zooming in to accurately brush around your subject this takes time or you can use the Range Mask tool to mask your brush. to do that grab the dropper tool and select the color you are looking to enhance this is especially useful for skies or skin tones and this will help keep those halos away.
3. Saturated & Sharpened Skin Tones
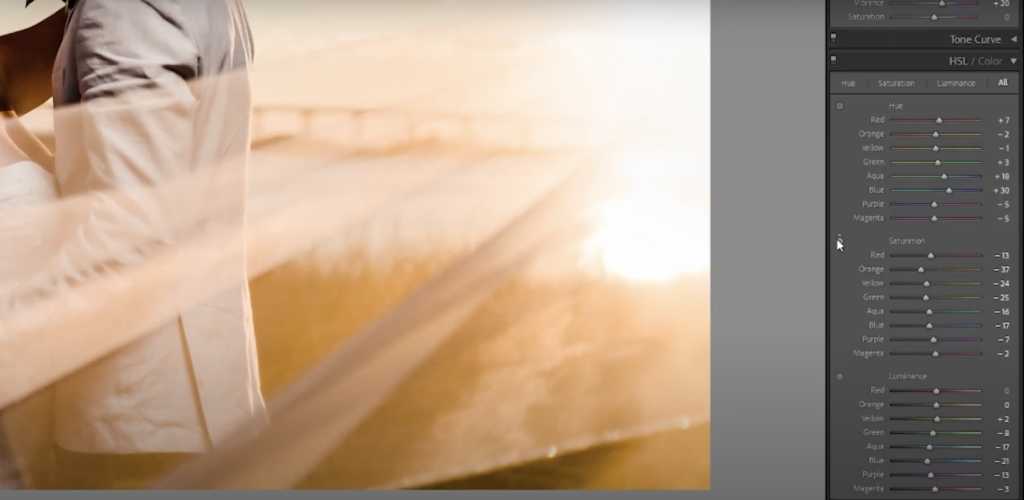
This is a mistake I like to refer to as ‘crushed’ skin tones. Skin tones are super important in wedding photography and getting beautiful skin isn’t always easy if you aren’t in the right light. If skin tones are starting to look too saturated, move down to the HSL panel and grab the icon located next to Saturation, hover over your subject’s skin, and left-click on your mouse drag down with your mouse to arrive at the saturation of the correct color channel. If you want to brighten up the skin or make your subject pop more, do the same thing except for this time, grab the Luminance icon and drag it up over your subject’s skin. If skin tones are starting to look too grungy or red you may need to dial back some contrast over the face. One of our favorite tools to use for fixing this mistake is the the De-Crush Skin Brush from the Visual Flow Retouching Toolkit is especially useful here.
4. Heavy Vignetting
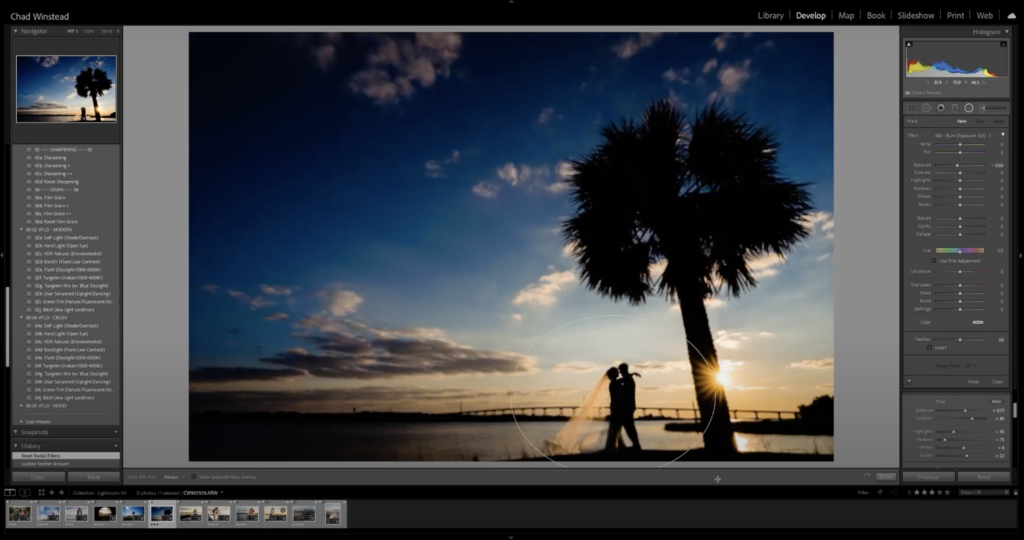
Similar to the halo effect, you can go overboard by adding a heavy vignette to your image. Not all vignettes are bad but, they aren’t all created equal either. They should be used to subtly draw your viewer’s eye to your subject when your subjects are composed. You can use the Effects panel to create your vignette but our recommendation would be to use a very soft feather and only go down on the amount slightly. If your subjects are off-centered use a radial filter with a -.50 Exposure Burn (available in our Visual Flow Retouching Toolkit). This gives the image a natural-looking vignette but won’t produce uneven exposure over your subjects.
5. Not Shooting in RAW Format
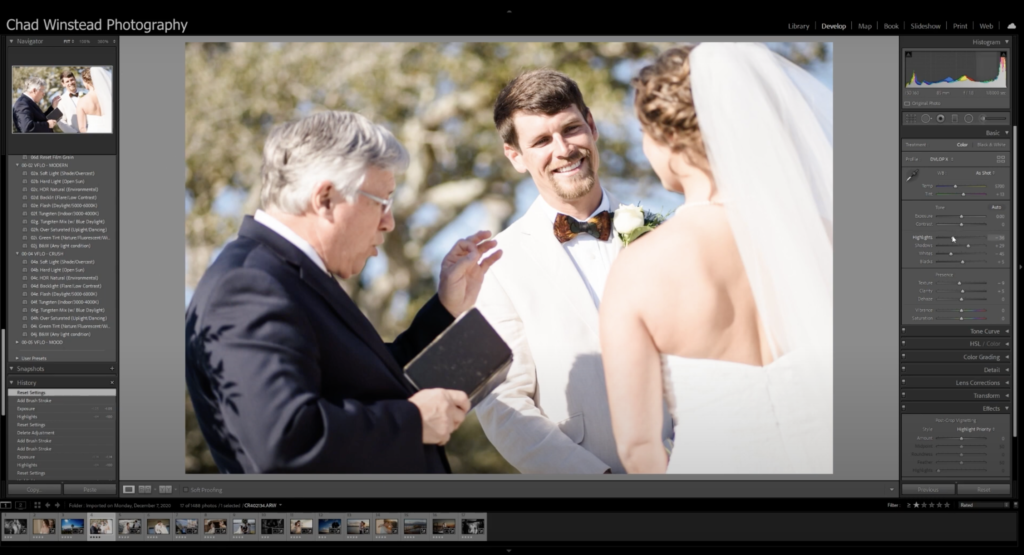
Now I know this may sound obvious to you seasoned pros out there, but this can be overlooked when prepping for a wedding. Shooting in RAW gives you the flexibility to edit your photos to your style and fix your mistakes. Weddings are fast-paced and you will not nail the exposure in every frame when you can’t always control the lighting that you’re given. RAW records substantially larger levels of brightness of an image compared to a jpeg this means you won’t always be able to recover those overexposed highlights or pull clean detail out of the shadows on a JPEG image you can also easily fix white balance and color with RAWs where JPEGs are extremely limited. RAW just allows you to enjoy non-destructive editing and better consistency from image to image.
Join us over in our Visual Flow Facebook Group for more tips and tricks on how to incorporate Visual Flow into your editing workflow seamlessly. For more in-depth Lightroom education make sure you watch our Visual Flow tips & tutorials videos over on our YouTube channel and check out SLR Lounge Premium education for full editing courses.
Leave a Reply
You must be logged in to post a comment.