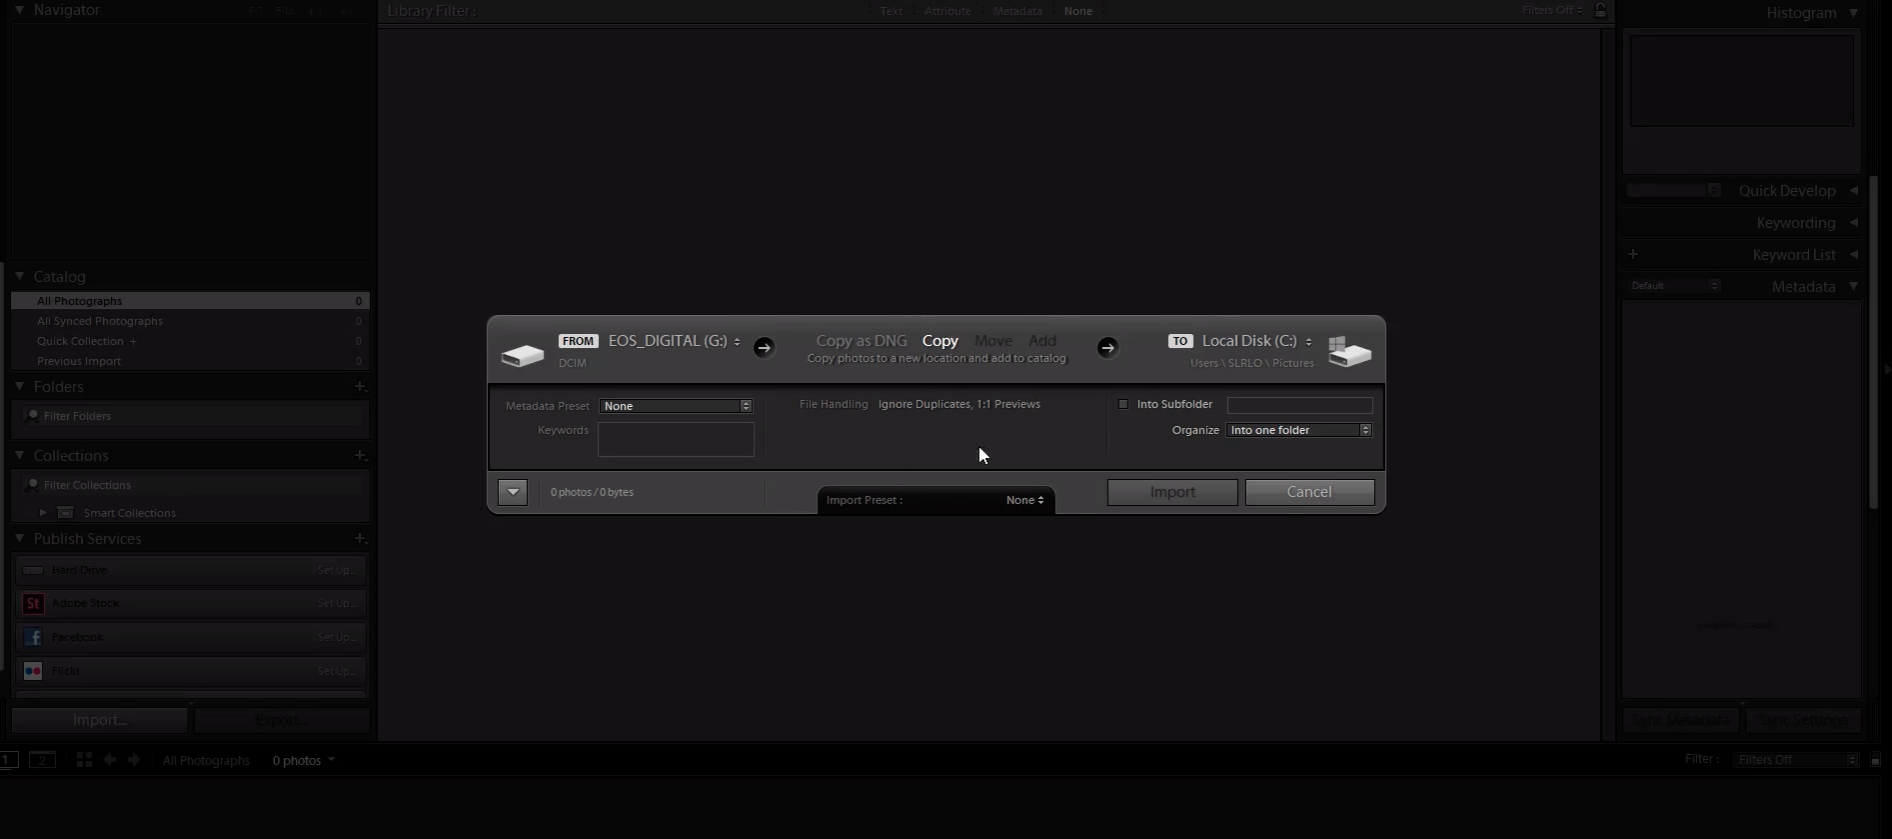
In a previous tutorial, we covered how to create a catalog in Lightroom CC Classic. Now, we are going to give a quick breakdown of the Import Dialog box and show you how to import photos into Lightroom CC Classic. We will also show you how to create a standard import preset to further maximize your post production workflow.
This tutorial is part of our Lightroom Tips Series, where we give you simple guidance on how to use Lightroom more efficiently and effectively.
Understanding the Import Process
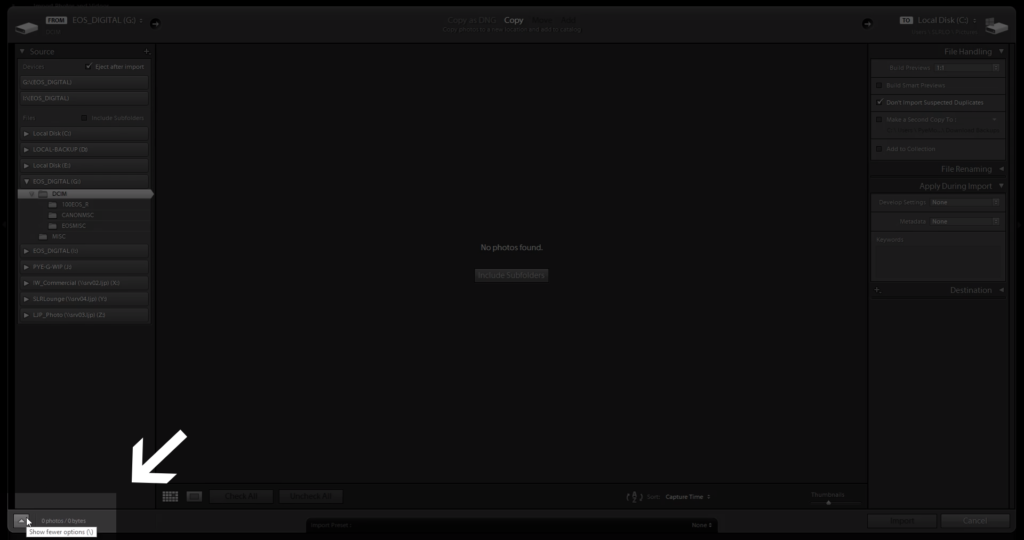
After you’ve opened a new Lightroom catalog, click on the backslash button in the lower left corner of Lightroom to show fewer options for importing images; an easy-to-understand version of the Import Dialogue box will appear that simplifies the import process and breaks it down into three parts (see the image below).

Basically, the import dialogue includes three sections from left to right:
On the left, you’ll find the import source (where the images are coming from).
In the center, you can choose one of four options for importing the images (copy as DNG, copy, add, move). We’ll describe each of these options in more detail below.
On the Right, you’ll decide where to place the images (which depends in part on your choice for the middle section)
Importing Images into Lightroom Classic CC
Using the Left Side of the Import Dialog Box
You can import images into Lightroom using one of at least four methods, including the following:
1. Press the “Import” button in the lower left corner (while Lightroom is in Library mode)
2. Press File > Import Photos and Videos
3. Press CTRL+Shift+I (Windows) or CMD+Shift+I (Mac)
4. Drag images from a folder (on your Desktop, for example) directly into the view area of the Library Module in Lightroom (this doesn’t work in the Develop Module). The benefit of this last method is that Lightroom automatically defines the source of the images since they were dropped into Lightroom from their original location.
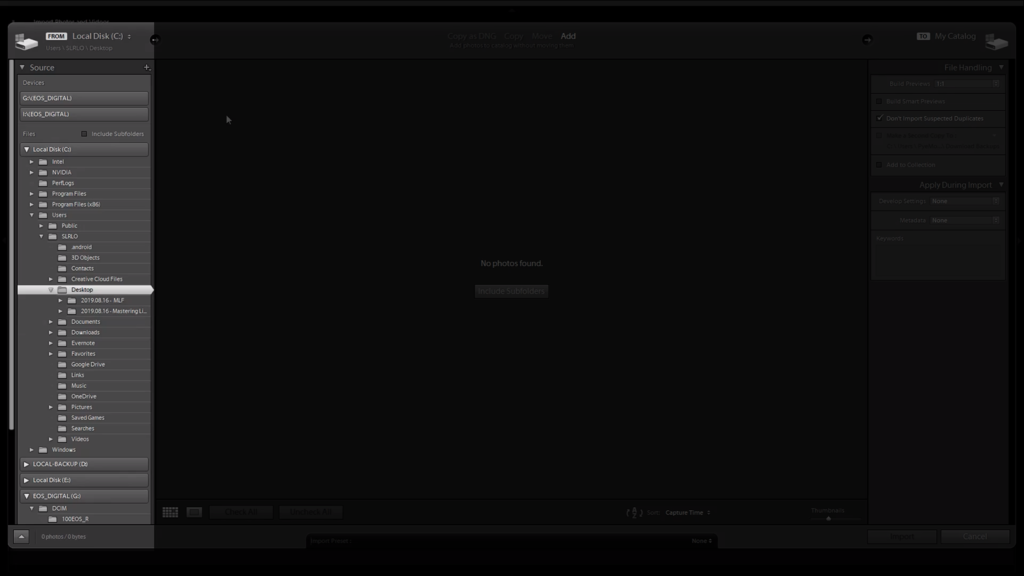
For the first three methods above, you’ll need to locate your images through the Source panel on the left so that you can import them into Lightroom (see image above). Your photos can come into Lightroom from a number of different sources, including memory cards, the local disk on your computer, network attached drives, or other external sources.
Import Shortcut
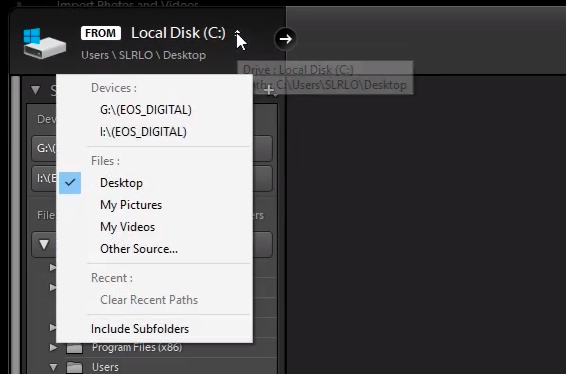
An import shortcut is available in the dropdown menu in the top left corner of the Import Dialogue box (see the image above). This can prove especially helpful if you regularly import images from the same location, such as your desktop.
Include Subfolders
One option to be aware of in the Source panel on the left is the “Include Subfolders” box. Basically, if you’ve selected “Desktop” under the “Local Disk” dropdown, for example, only images that are actually stored on the desktop will appear.
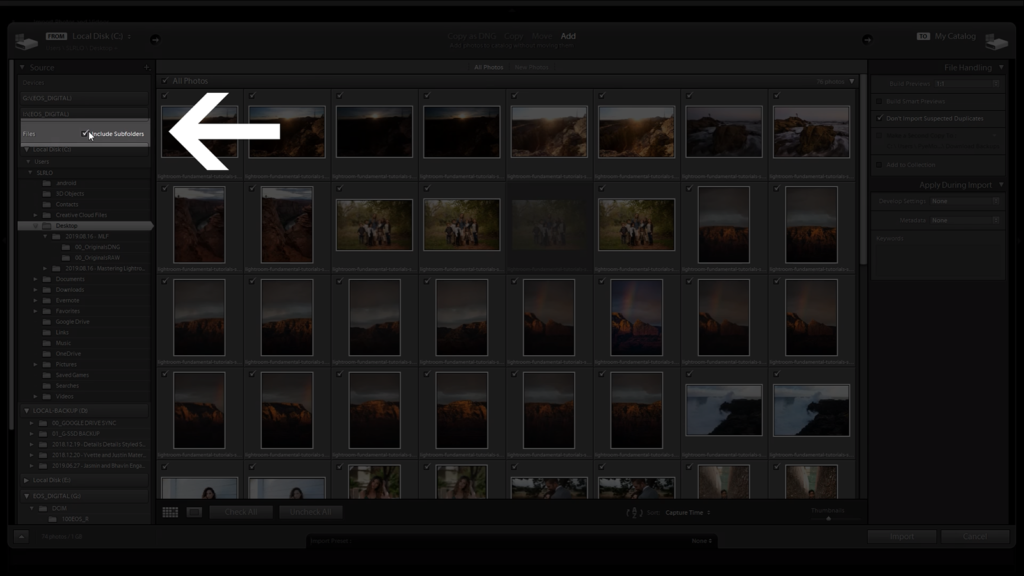
If you want to access images that are stored in a folder on your desktop, you can select the “Include Subfolders” checkbox and all of the images that are kept in folders on your desktop will populate the library viewing area in the center of the Import Dialog box.
This option works great in some instances, such as when you’re importing from a memory card and there are multiple folders to choose from.
Using the Center Section of the Import Dialog Box
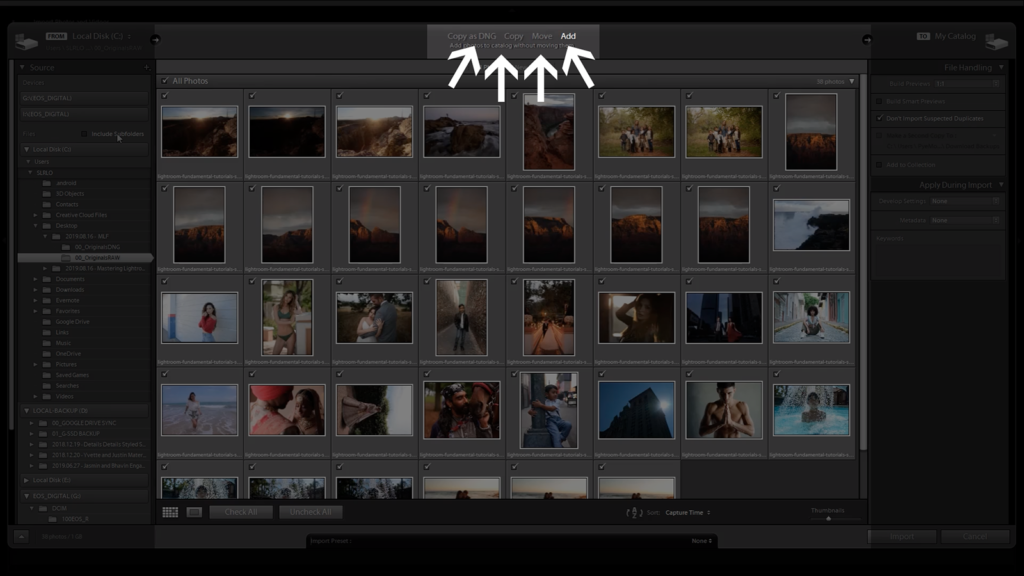
Once you’ve located your file source for importing images, you’ll need to decide how you want them imported into your Lightroom catalog. Here are the four import options as noted above about the “center” section of Adobe’s Import Dialogue box:
Copy as DNG: This option copies files from the import source and converts the files into the DNG file format as they’re imported. This is a more time-consuming import option and can run twice as long as the “copy” option, which is outlined below.
Copy: This option imports the original raw file as it was captured in your camera and stores the files in whichever location/folder you designate for import. This option is best used if you need to copy files from a memory card; otherwise, you may be creating duplicates.
Move: This option works well for importing images from existing folders on your computer, but it should be used with caution. The “move” option copies files to a designated folder and then deletes the files from the source folder. It takes longer to “move” files than it does to “add” them, which we discuss below.
Add: Adding files from an existing folder is a quick and convenient way to populate your LR catalog with your images. The files are simply “referenced” rather than copied.
“Checking” Your Images for Import
When importing photos, you’ll need to “check” the images you want imported. Any image that’s checked will be imported, and any image that isn’t checked will not be imported. You can check images in a number of ways, as illustrated in the images below:
Option 1: Select “All Photos”

Option 2: Select “Check All” or “Uncheck All”

Option 3: Select Individual Images or Hold Shift and Select a Group of Images

Loupe View Vs. Grid View

When previewing your images for import, you can choose between Loupe View (by pressing “E”) and Grid View (by pressing “G”). Grid view will display a full grid of your images while Loupe view will display them one at a time (as shown in the image above). In order to get out of the import dialogue as soon as possible, we recommend just using Grid view.
You can press “-” or “+” to decrease or increase the size of your image thumbnails in Grid view in Lightroom.
Using the Filter to View Your Images
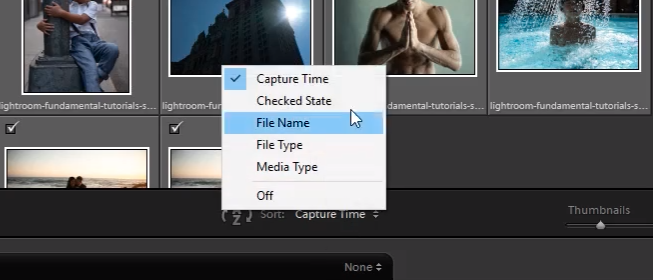
Near the bottom center of the Lightroom Import Dialog box, you’ll find a dropdown menu for sorting your images. As you can see in the image above, there are several options for sorting your photos, including capture time, checked state, file name, and more.
Using the Right Side of the Import Dialog Box in Lightroom
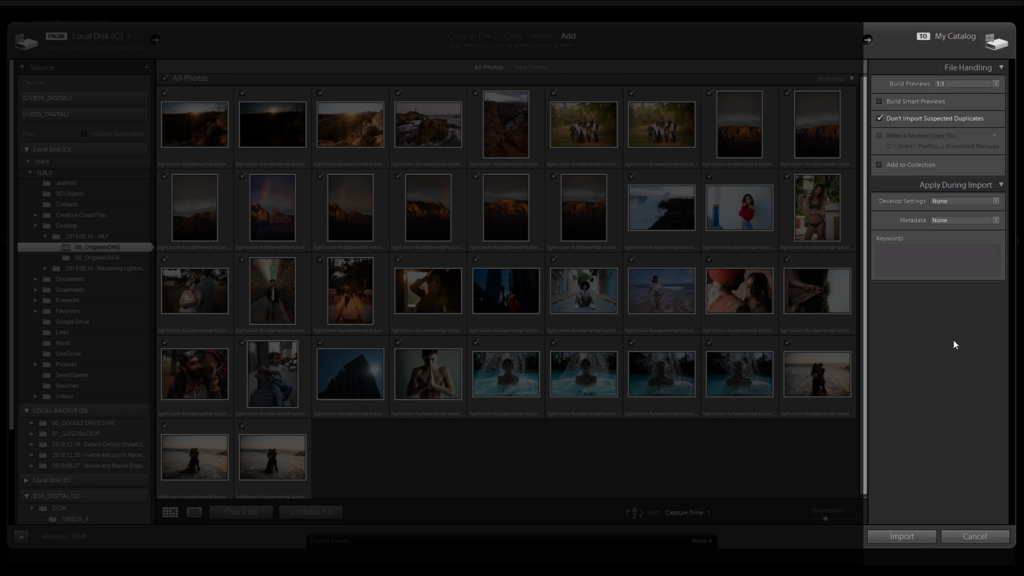
Now that we’ve decided what to do with our images, we need to decide how to handle and rename (or not) our files, as well as choose where to send them.
Handle Your Files
Build Smart Previews: The File Handling dropdown menu allows you to choose whether or not you want to “Build Smart Previews,” which is an option that can help speed up your workflow while editing in the Develop Module as it only loads previews when processing images instead of the original image files.
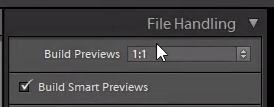
If you intend to sit and develop immediately upon import, we recommend selecting Smart Previews and setting the Build Previews ratio to 1:1. Let your machine finish importing and rendering your previews, and then begin working on your catalog.
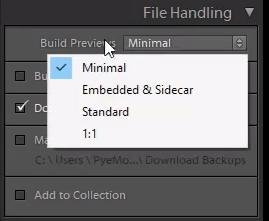
If you intend to sort through and cull the images first, rather than begin editing, then we suggest turning your previews off and switching your “Build Previews” too minimal (see the image above). If you choose this route, we suggest you render your images at a later time before editing them.
When using Smart Previews, you’ll probably see a decline in overall quality when you are viewing the images in the Develop module, but the image quality will look great when you export the files.
Don’t Import Suspected Duplicates: We recommend leaving the “Don’t Import Suspected Duplicates” option checked for obvious reasons.
Make a Second Copy To: If you want to back up the images when Copying them to a new folder, you can choose a destination under the “Make a Second Copy To:” dropdown menu.
Add to Collection: You can also add your images to a collection, which can come in handy organizing your files into specific categories, such as “Trucks” under an “Automobiles” folder, for example. We don’t generally use this option, but it does come in handy.
Rename Your Files…or Don’t
We usually avoid renaming files during import because the file names won’t match up to the location from which you imported the images, but your preference may vary depending on your workflow.
Apply During Import
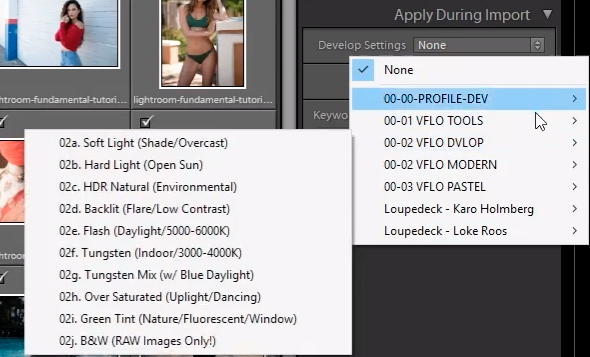
This is a very useful section in the import process because you can apply presets under the “Develop Settings” dropdown menu to minimize repetitive tasks for editing your photos (see example above). You can also add Metadata presets if you have them as well as keywords.
Select a Destination for Importing Your Images
Go to the Destination dropdown menu, located on the right side of the Import Dialogue Box. Here, we are going to select the destination for our images.
If you’ve selected the “Add” option in a previous step for importing your photos, you’ll notice there is NO destination option for you to choose where to keep your images. This is because, with that option, Lightroom will only reference images from their original source, which may be in a folder on your desktop, for example. If you are moving or copying images, however, you’ll need to select a destination.
Click “Import”
Finally, after you’ve chosen a destination for your images, simply hit “Import,” which is located at the bottom, to import your images.
How to Create a Standard Import Preset
Now that you’ve set up your import preferences, you can easily create a standard import preset (if the options you selected are those you’d regularly choose). A standard import preset can be applied to all of your images in just a few clicks. Here’s how you save everything you’ve just done as a standard import preset.
Go to the very bottom of the Import Dialogue Box, where it says “Import Preset.” As shown below, click on the dropdown menu and select “Save Current Settings as New Preset.”
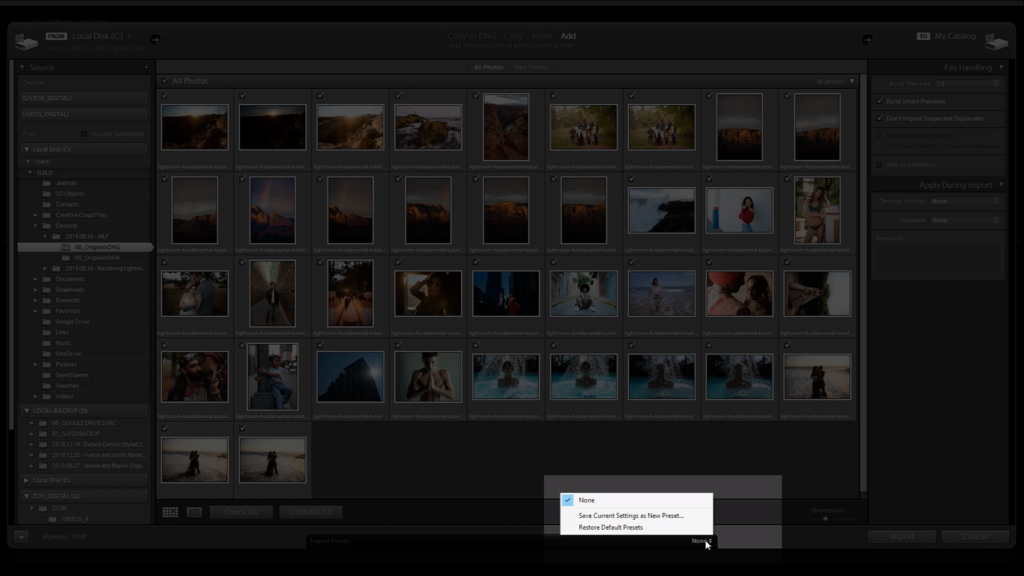
A dialogue box will appear where you will name the preset. In the example below, we have named it “Fundamentals Demo,” but you can name it however you like. Now, hit “Create.”
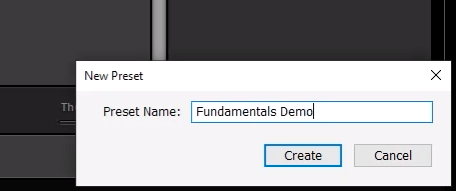
Now, when you import your images into Lightroom, you can go down to “Import Preset” at the bottom of the Import Dialogue Box and just select “Fundamentals Demo.” It will also automatically include your metadata and develop settings into the images as well.
The Import Dialogue Box will now just show where your images are being imported from and where they are being imported to. Click on the “Import” button if you are ready to import your images.
Conclusion & Learn More!
Once you understand the import process and how to create a standard import preset in Lightroom, be sure to check out our other articles on how to create a standard import metadata preset to further maximize your Lightroom editing workflow. You can also check out our article on how to use tethered capture to import photos directly into Lightroom from your camera in 5 simple steps!
Always make sure to back up your images to a second source to avoid losing your work.
Additional Learning Resource: Adobe’s “In a Lightroom Minute Series”
Episode: How to Import Photos into Lightroom Mobile
