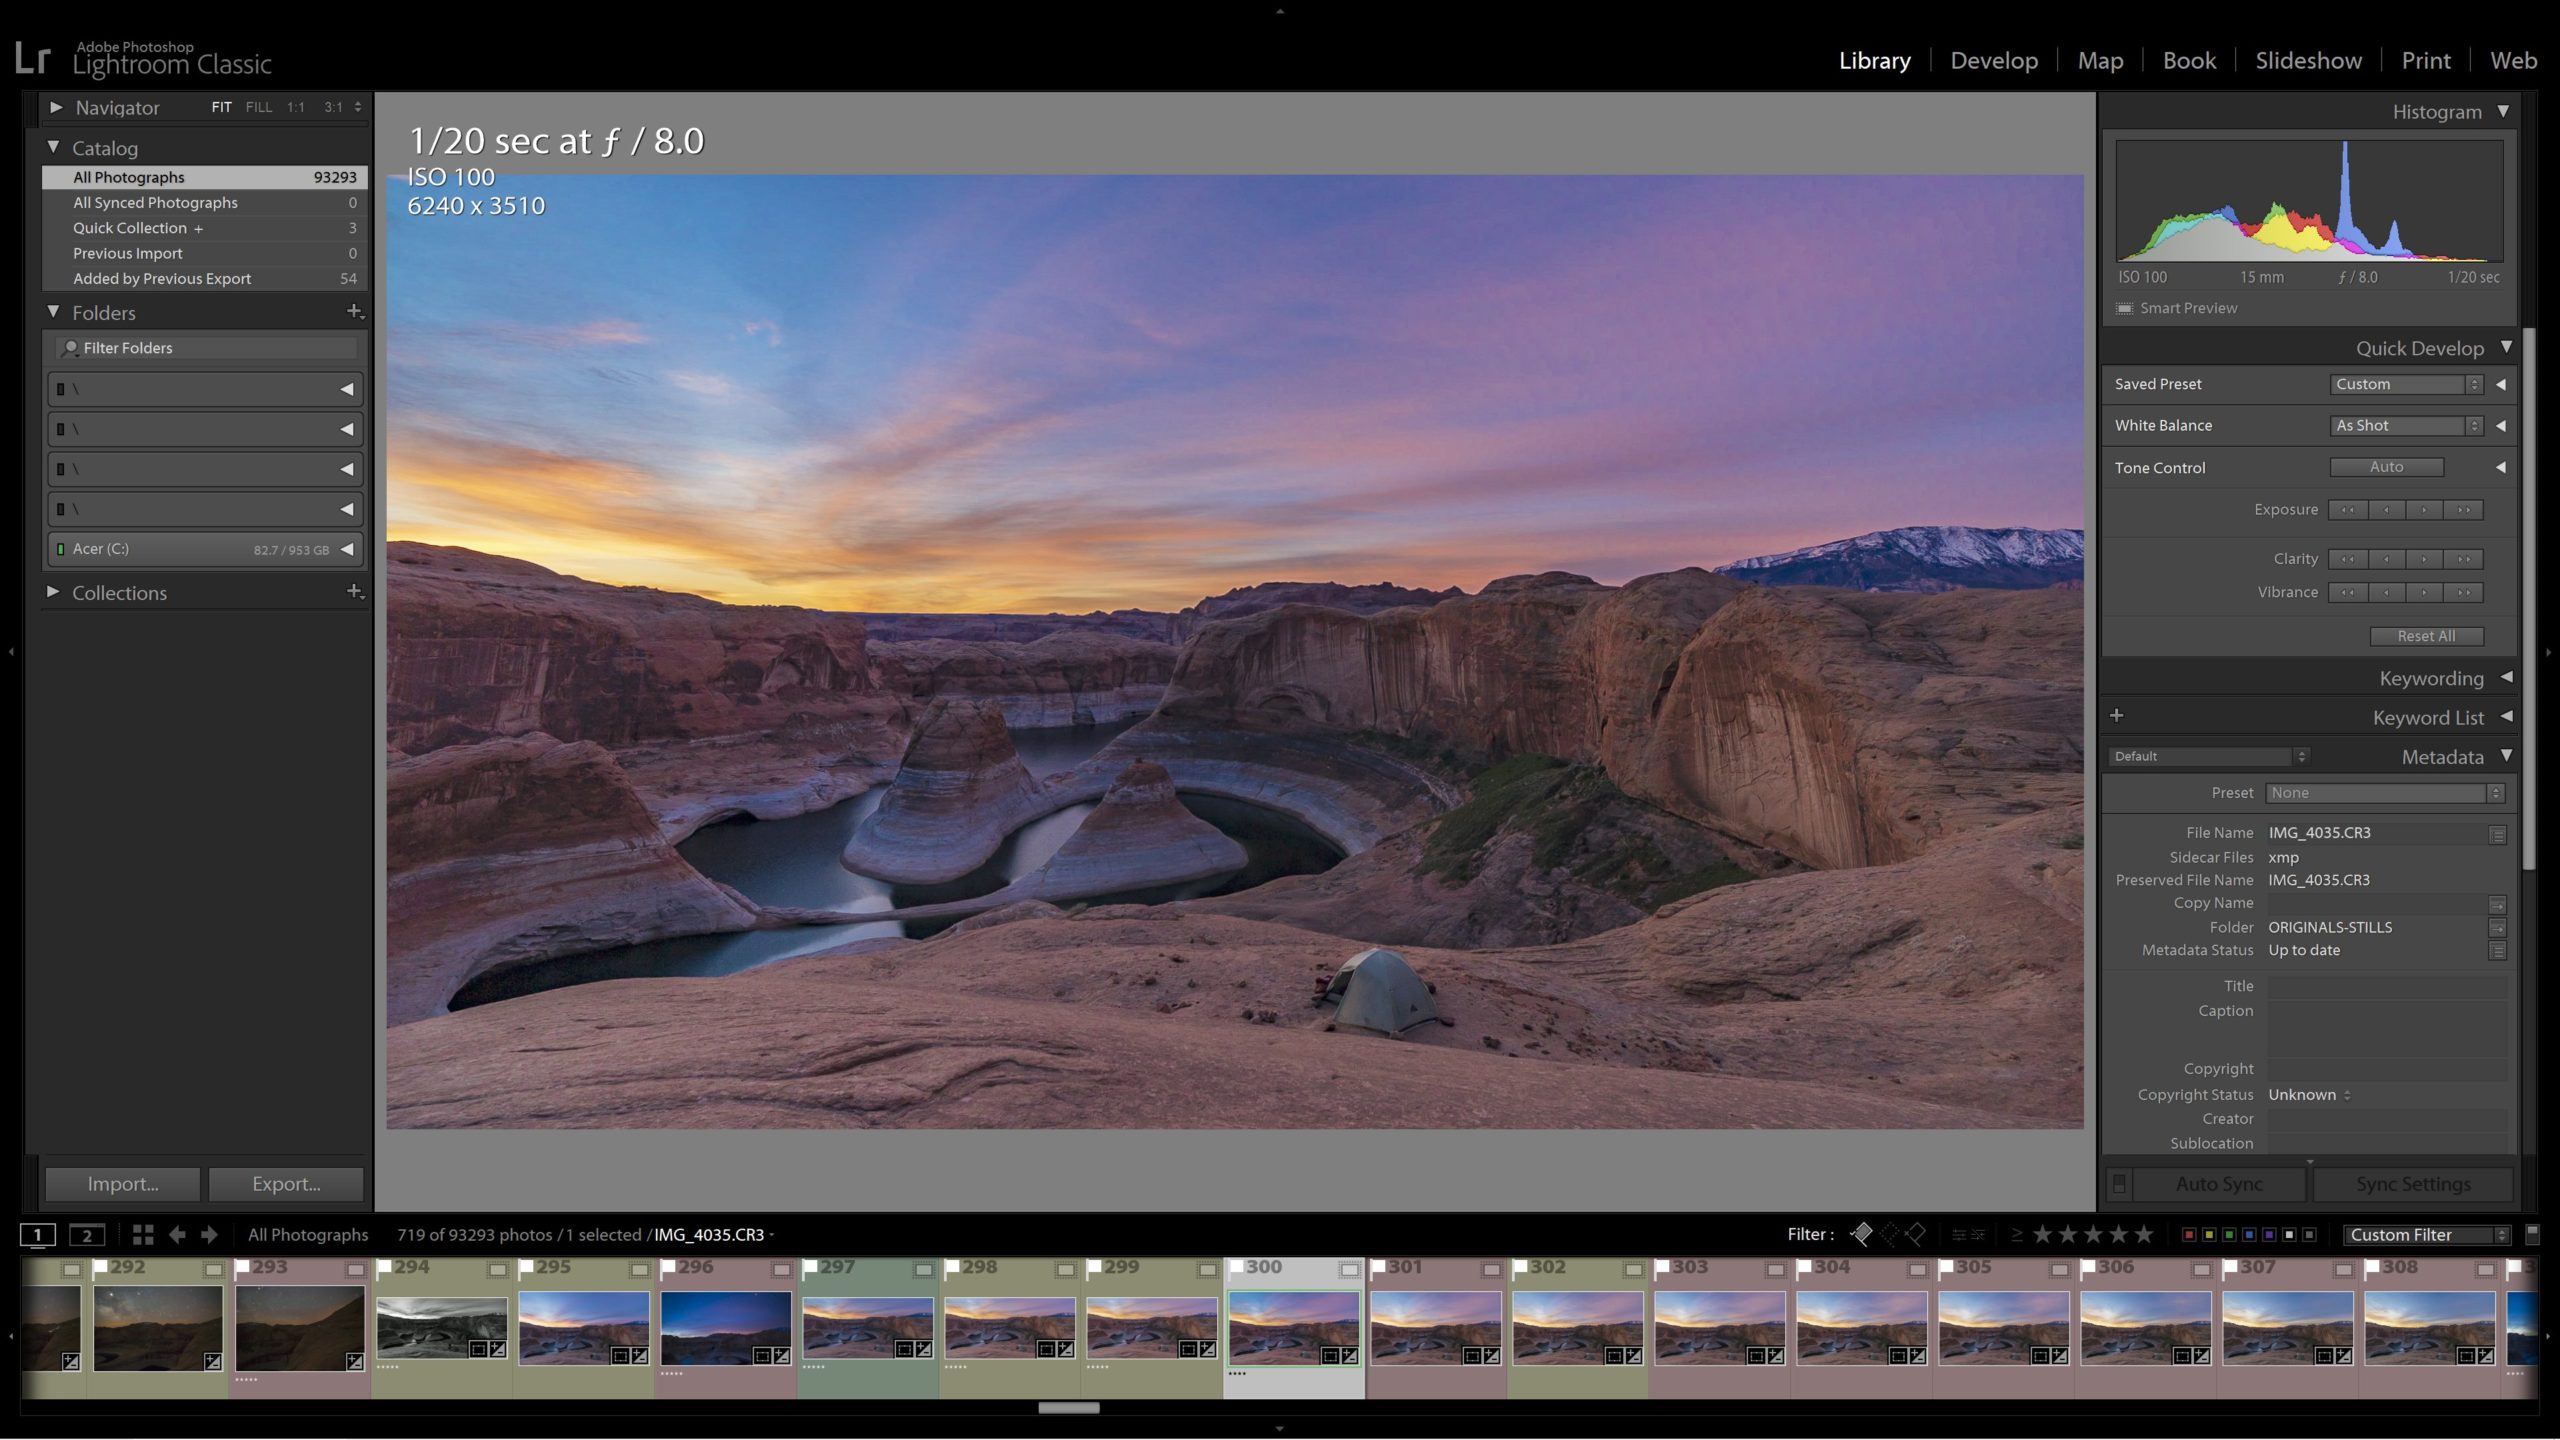
Lightroom can be an extremely powerful workflow tool for color-correction, and so much more. You can use it to organize your photos, and not just keep track of where they are on your computer, but sort the keepers from the rejects, rate them, and many other things!
However, a whole lot of Lightroom’s speed comes from the use of hotkeys, or keyboard shortcuts for Mac & PC. In fact, without keyboard shortcuts, you’re really missing out!
Fortunately, with just a few key (no pun intended?) Lightroom shortcuts for Mac & PC that are relatively easy to remember, you can be flying through your workflow in no time. In this article, we’ll list all of the most important keyboard shortcuts that you need to know to get started, organized as you would use them during your start-to-finish workflow.
Lightroom Module Hotkeys/Shortcuts
Some of the most common lightroom shortcuts for Mac & PCs are going to be the simplest, the ones that help you switch between the different Lightroom Modules.
So that you don’t feel overwhelmed, we’ve used BOLD for the only three that we use very often! Start by memorizing these, and then just remember that if you need to know more, you can always go into the Library Module and see the hotkeys by hitting the “View” main menu tab.
Also, remember that the main window menu (the top level) has drop-down menus that have all available hotkeys listed for you! You can always refer to this as a last resort to see if a function or tool you use often has its own hotkey…
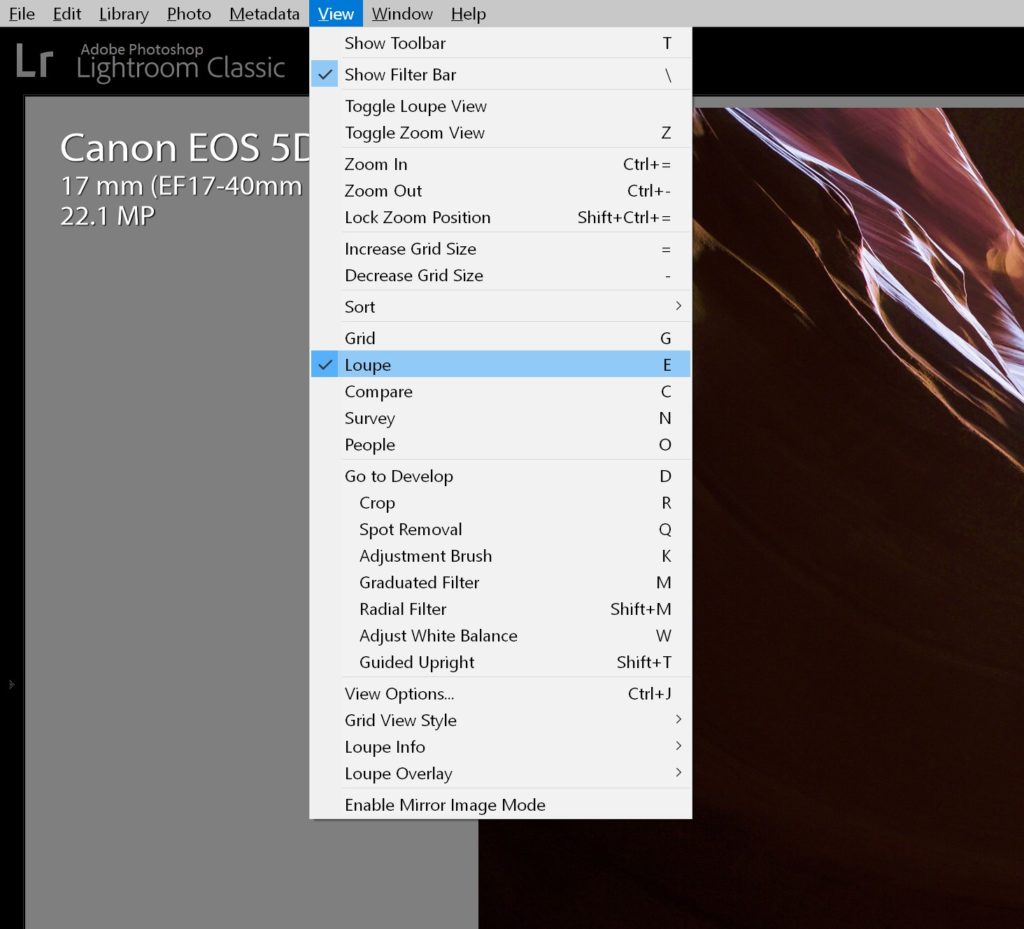
- “G” = Gride Mode (Part of the Library Module)
- “E” = Loupe Mode (Part of the Library Module)
- “D” = Develop Module
- “C” = Compare Mode, in the Library Module
- “N” = Survey Mode, in the Library Module
- “O” (the letter, not the number) = People (Lightroom’s Face-ID system)
Lightroom Information Hotkeys
In both the Library Module and the Develop Module, there are a few hotkeys that show, cycle through and hide various additional information that you might want to see, such as the filters panel, and EXIF information for individual images:
- “\” (the backslash key) = Display or hide the main filter panel, available in Grid Mode of the Library Module only
- “T” = display or hide the Sort order panel beneath images in the Loupe (Library) and Develop Module. This panel also displays information for some tools such as the burning/dodging brushes and Spot Removal / Retouching brush.
- “I” (i) = display, cycle through, and hide custom image info in the Loupe
- “J” = Display, cycle through, and hide custom image information in the Grid (Library) module
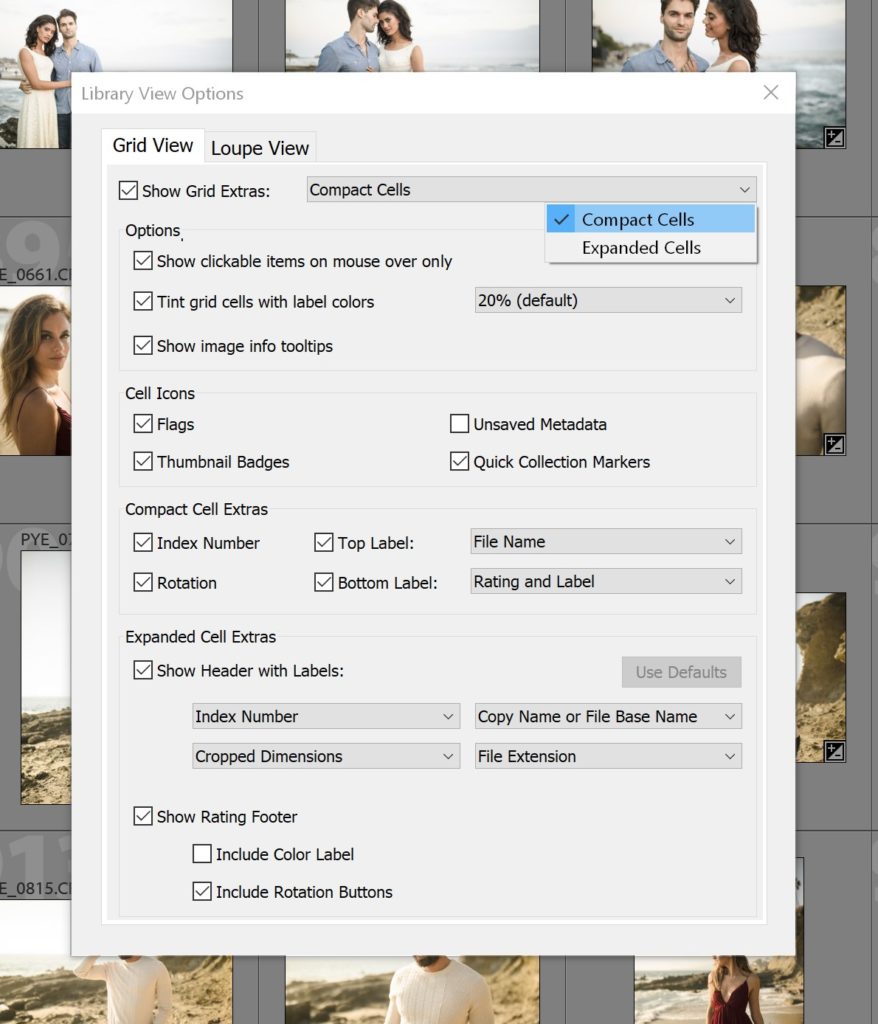
- “CMD/CTRL+J” = Open the settings for information display, including the Library Module Grid Mode, Loupe Mode, and the Develop Module. (See Below)
Lightroom Viewing Hotkeys/Shortcuts
Before we begin our workflow of sorting and editing our images, there are a few more useful hotkeys/shortcuts that can help you display your images exactly the way you want:
- “-” (minus sign) = Make images smaller in Grid Mode of the Library Module
- “+” (actually, the “=” key) = Make images larger in Grid Mode
- “F” = View one image full-screen
- “Tab” = Display or hide the two side panels, AKA tabs, while leaving the bottom filmstrip visible (See below)
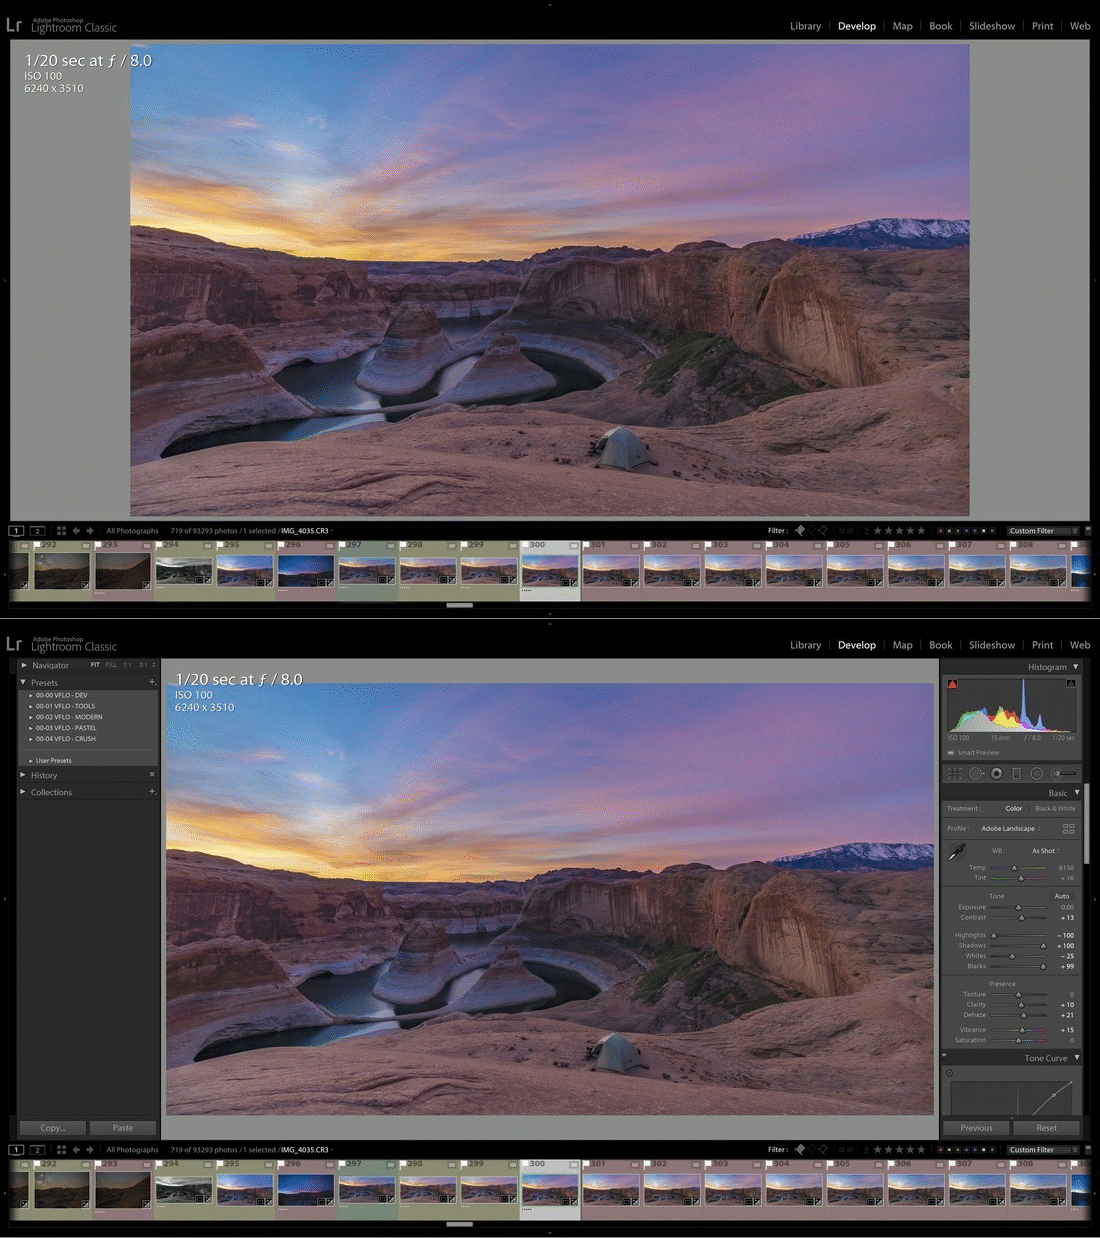
- “Shift+Tab” = Hide all Panels, while leaving image info (EXIF) visible
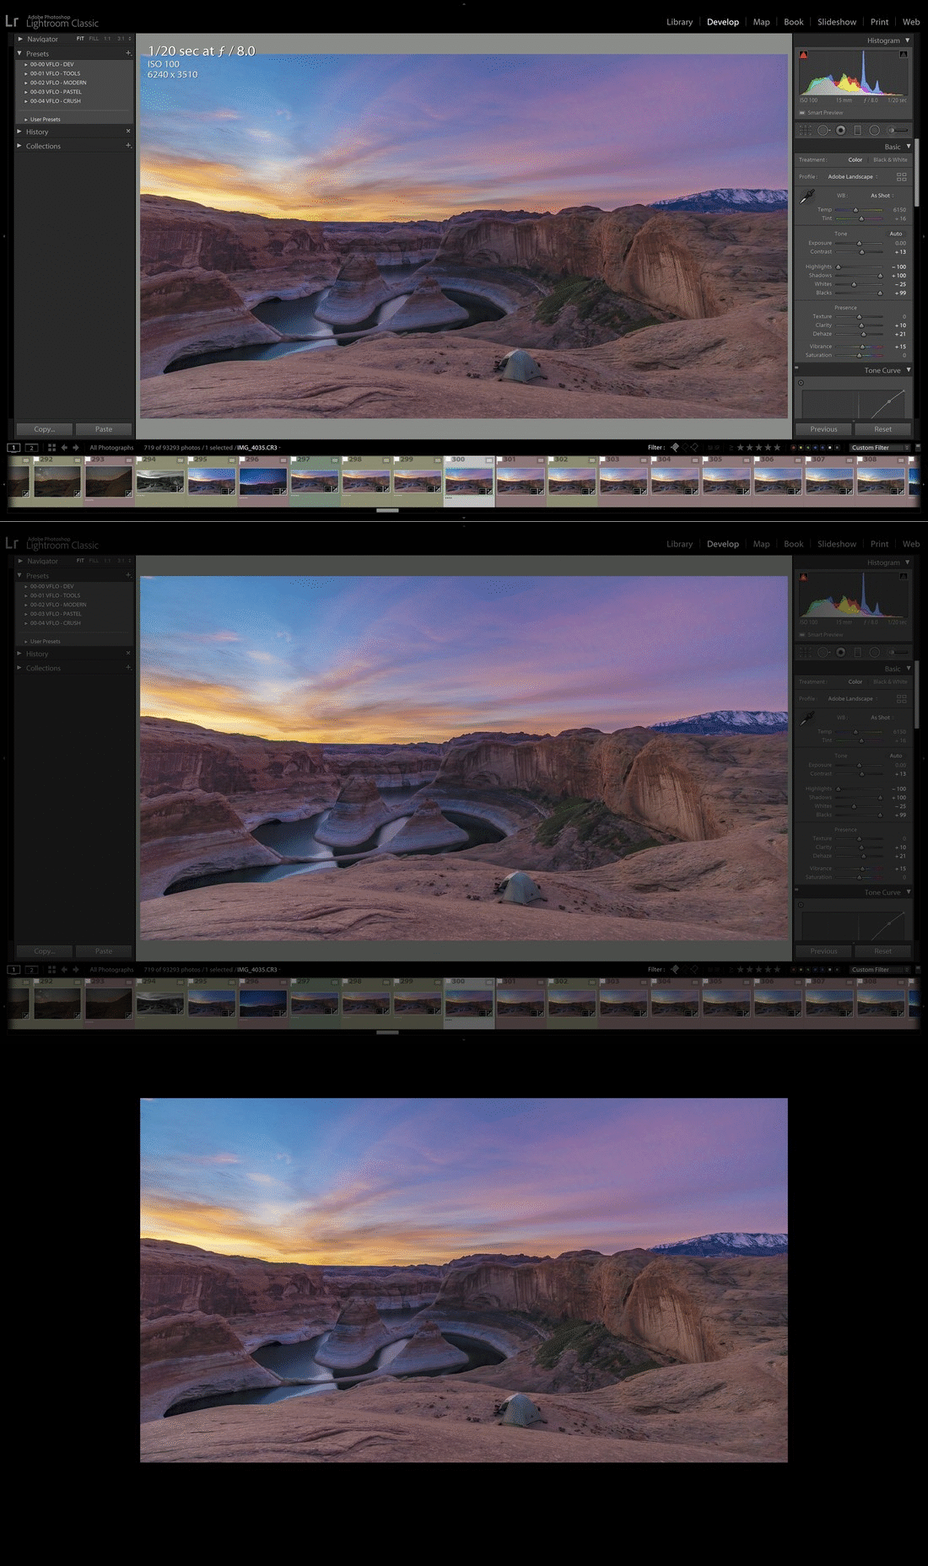
- “L” = Darken everything around the selected images (Cycle through 3 options: off, opaque black, and 100% black) (See below)
Lightroom Flag Shortcuts for Mac & PC
To rapidly cull (sort) your images in Lightroom, you can use any of the different methods of flagging your images. These Lightroom hotkeys/shortcuts work in both the Library Module and the Developt Module, by the way.
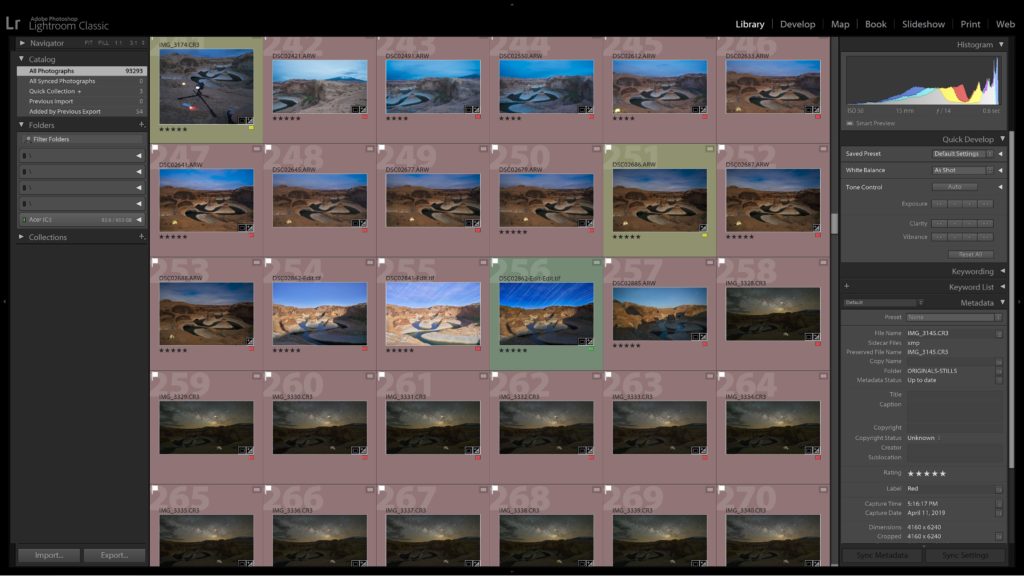
There are three different categories of Lightroom flags: Keeper/Reject flags, star ratings, and color labels:
- Lightroom Flags: Keepers, Unflagged, Rejects
- “P” = Keeper
- “U” = Unflagged
- “X” = Reject
- Lightroom Flags: Star Ratings
- Use number keys 1-5 to designate 1-5-star image ratings
- Use “0” (zero) to un-rate an image
- Lightroom Color Labels
- “6” = Red
- “7” = Yellow
- “8” = Green
- “9” = Blue
- Purple has no hotkey by default
- To undo a color label, hit that same key (6-9) again
- Caps Lock = When you’re sorting through your images, be aware that if you have the Caps Lock key active, Lightroom will auto-advance to the next image every time you apply any of these three categories of flags/labels! If you don’t want this, just hit the Caps Lock key again to disable the option.
Lightroom Develop Module Keyboard Shortcuts
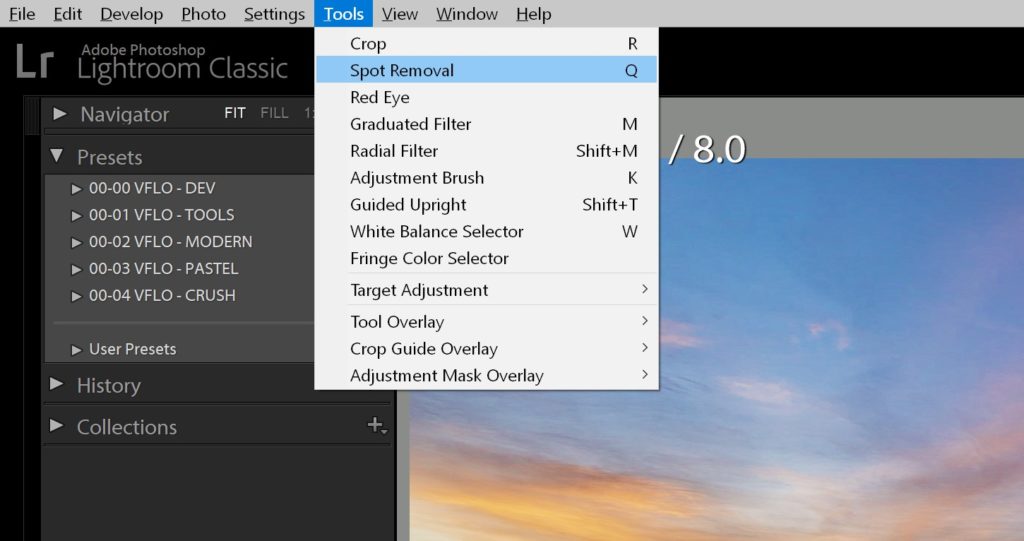
In the Develop Module of Lightroom, there are innumerable keyboard shortcuts, in fact, there is a hotkey for virtually every single tool and option in the entire module!.
Don’t feel overwhelmed, though; there are only a few that we use regularly in our everyday workflow. Start with trying these:
- “R” = Crop Tool (Also, to reset your crop, you can hit CTRL+ALT+R on a PC, or CMD+Option+R on a Mac)
- “K” = Brush Tool (burning & dodging, as well as almost every other available slider)
- “W” = White Balance (Dropper) Tool
- “Q” = Spot Removal (Retouching) Brush Tool
- “M” = Graduated Filter Tool
- “Shift+J” = Radial Graduated Filter Tool
- “J” = View or hide the Highlight/Shadow clipping warnings
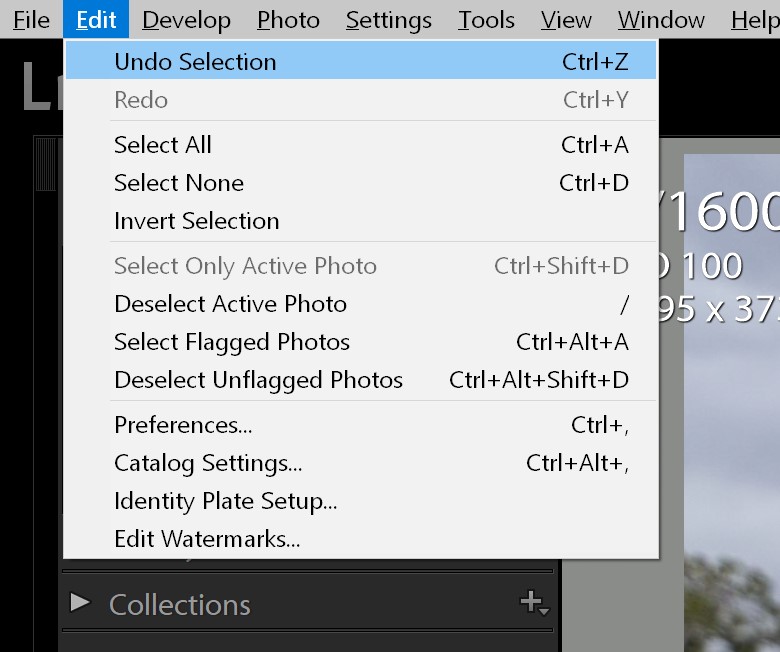
- “CMD/CTRL+Z” = Undo
- “V” = Toggle an image between Color and Blach & White
- “CTRL/CMD+Shift+C” = Copy settings from the currently selected image
- “CTRL/CMD+Shift+V” = Paste settings from what was copied
- “CTRL/CMD+Shift+V” = Paste the previously selected images’ settings to the currently selected image
Lightroom Edit & Export Keyboard Shortcuts
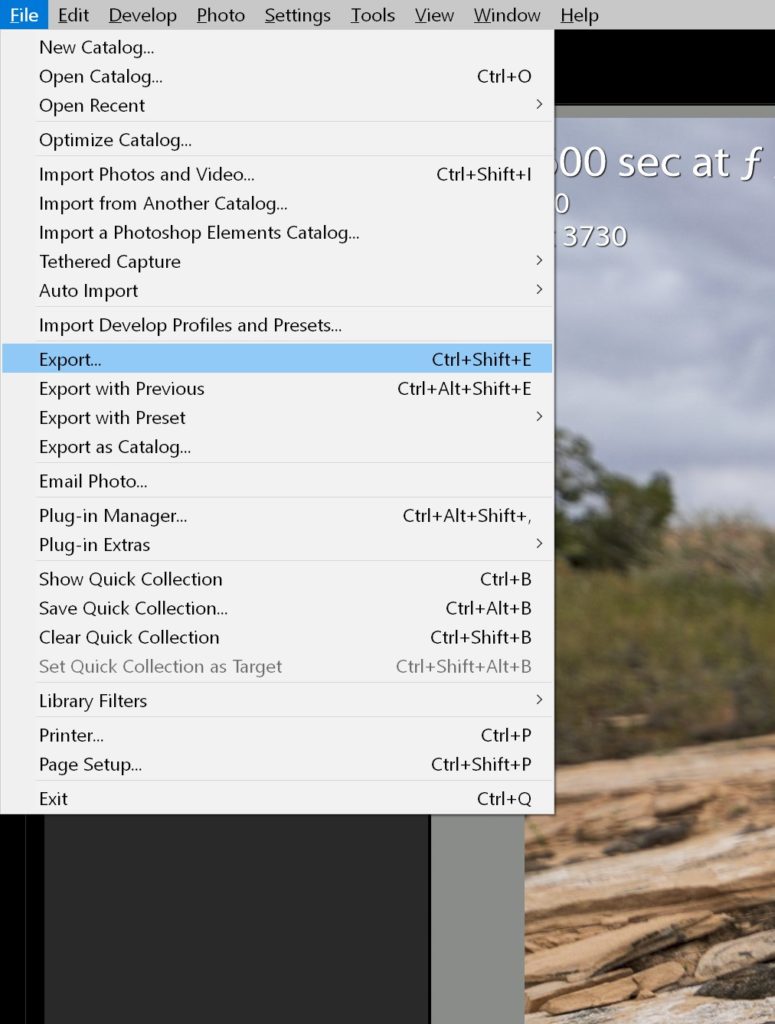
Once you’re done editing your photos in the Develop Module, you might want to export them, or take them into Photoshop for more advanced retouching/editing.
- “CMD/CTRL+E” = Edit a photo or photos in Adobe Photoshop
- “CMD/CTRL+Shift+E” = Export a photo to JPG or TIF or DNG for uploading to the internet, or printing
Premium Lightroom Video Tutorials
You can find our full workshop on Mastering Lightroom here.
