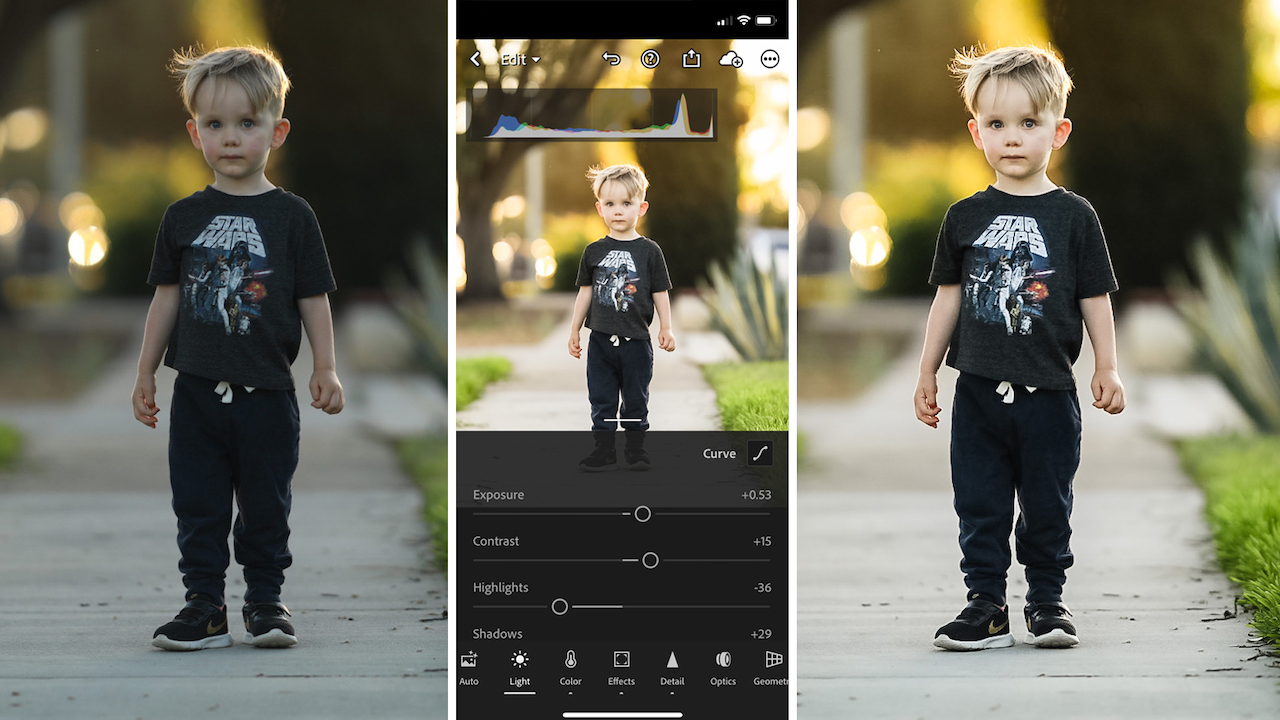
Over the last couple years, Lightroom mobile has evolved from an unremarkable photo editor into a worthwhile post-production app, much like the desktop version, worthy of professional photographers and enthusiasts alike. Among the most useful tools in the Lightroom mobile workflow (or any photo editing workflow), you’ll find presets, those one-click wonders that allow you to produce amazing results in a consistent, efficient manner. Thankfully, especially for those of us on the go, it’s super easy to import or create presets in Lightroom mobile.
In this article, we’re going to show you how to create your very own presets in Lightroom mobile in three quick and easy steps. If you’d like more information on how to import presets (such as those you purchased from Visual Flow or some other preset maker) into your Lightroom mobile app, be sure to check out this article.
**It’s worth noting that you cannot share or sell the presets you create with Lightroom mobile unless they are synced to Lightroom for Desktop.
Step 1. Edit Your Photo
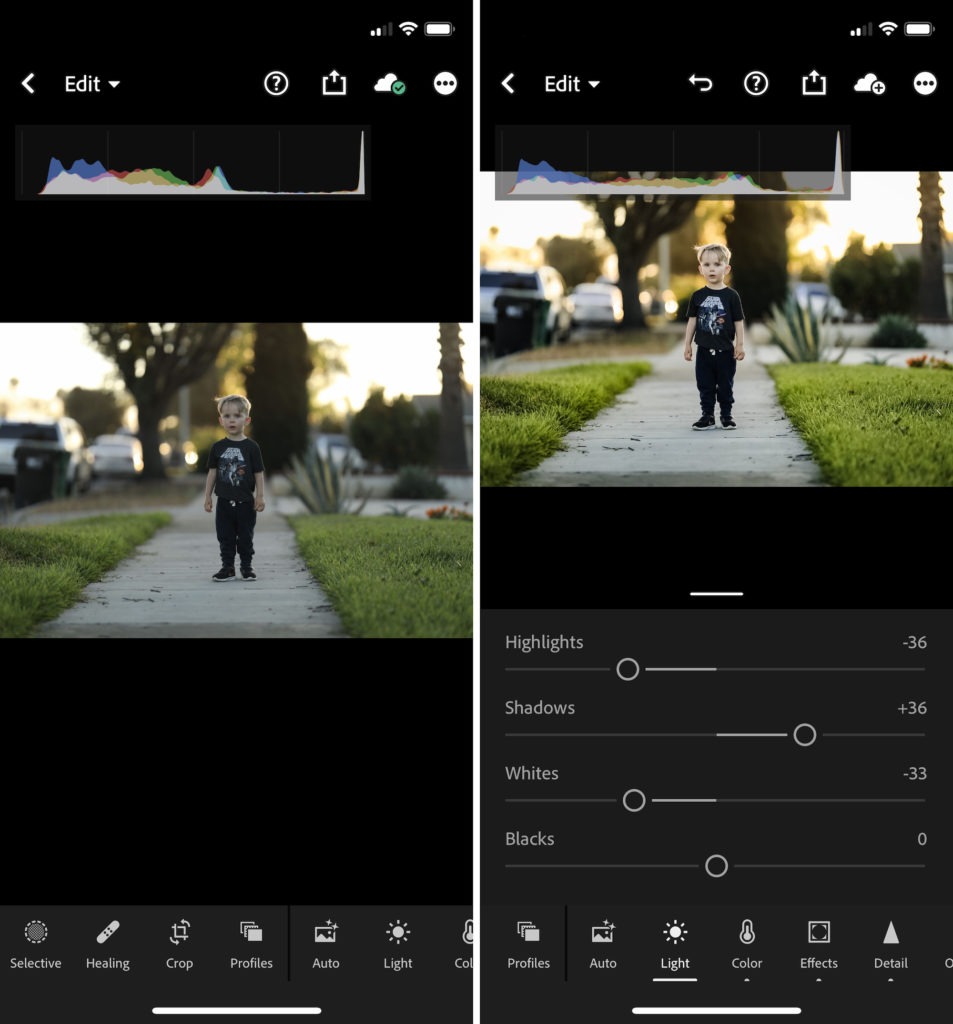
When creating presets in Lightroom mobile, you can either start from scratch or build on an existing preset. Dial in your adjustments for contrast, highlights, shadows, or any other settings until the photo is edited to your liking. We recommend leaving exposure and white balance adjustments out of your preset as those tend to change from scene to scene and may not apply as universally as the other settings. You can always make a quick adjustment to the exposure and/or white balance after applying your preset.
Step 2. Create Your Preset
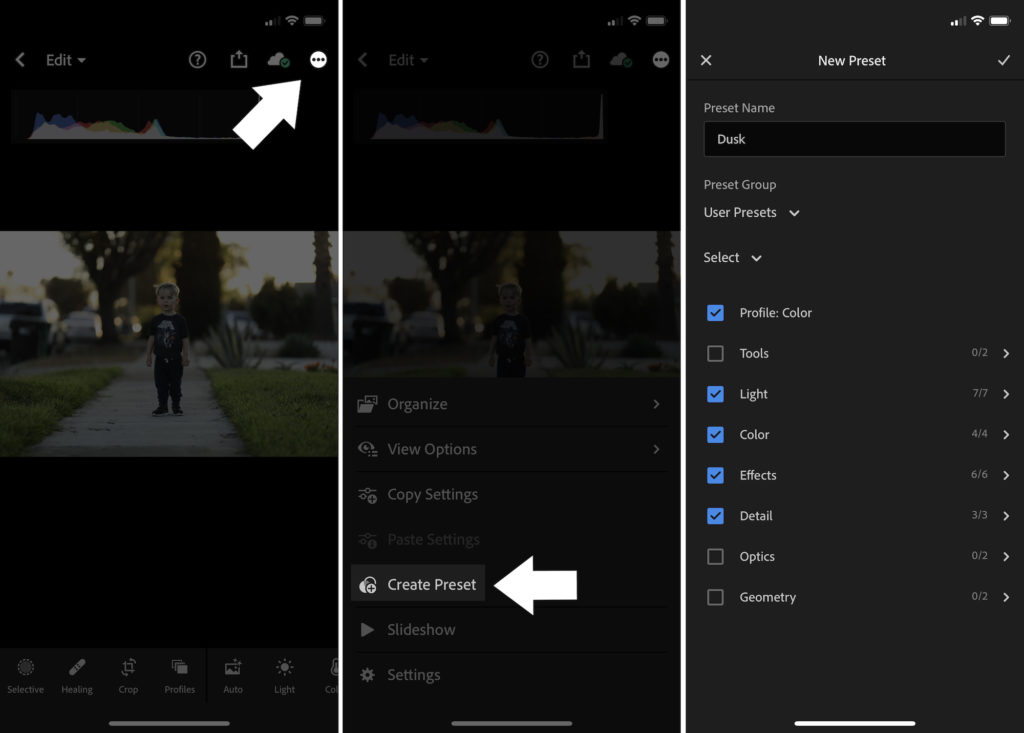
When your edit is complete, tap on the three dots (…) in the upper righthand corner of the Lightroom Mobile app.
Next, select “Create Preset” from your available options.
From there, the “New Preset” screen will open with options to further customize your Lightroom mobile preset. Be sure to name your preset and assign it to a group, such as “User Presets.” Naming and grouping your presets will allow you to keep everything organized, which is another important aspect of maintaining an efficient photo editing workflow, regardless of the application you use.
When selecting your options, such as Light, Color, and Effects, be sure to choose those that are more universal scope so that you can effectively apply the preset to a wider base of images. For example, including crops (which are featured under the “Geometry” option) will likely result in having to make additional adjustments during the editing process because you’ll rarely apply the same crop to different photos. After you’ve made your selections, click on the checkmark in the upper righthand corner of the app to save your new preset.
Step 3. Use Your Lightroom Mobile Preset
Once you’ve saved your new Lightroom mobile preset, you can start applying it to your photos! Simply open a photo that you want to edit and click on the “Presets” button in the nav bar under the image (see below).
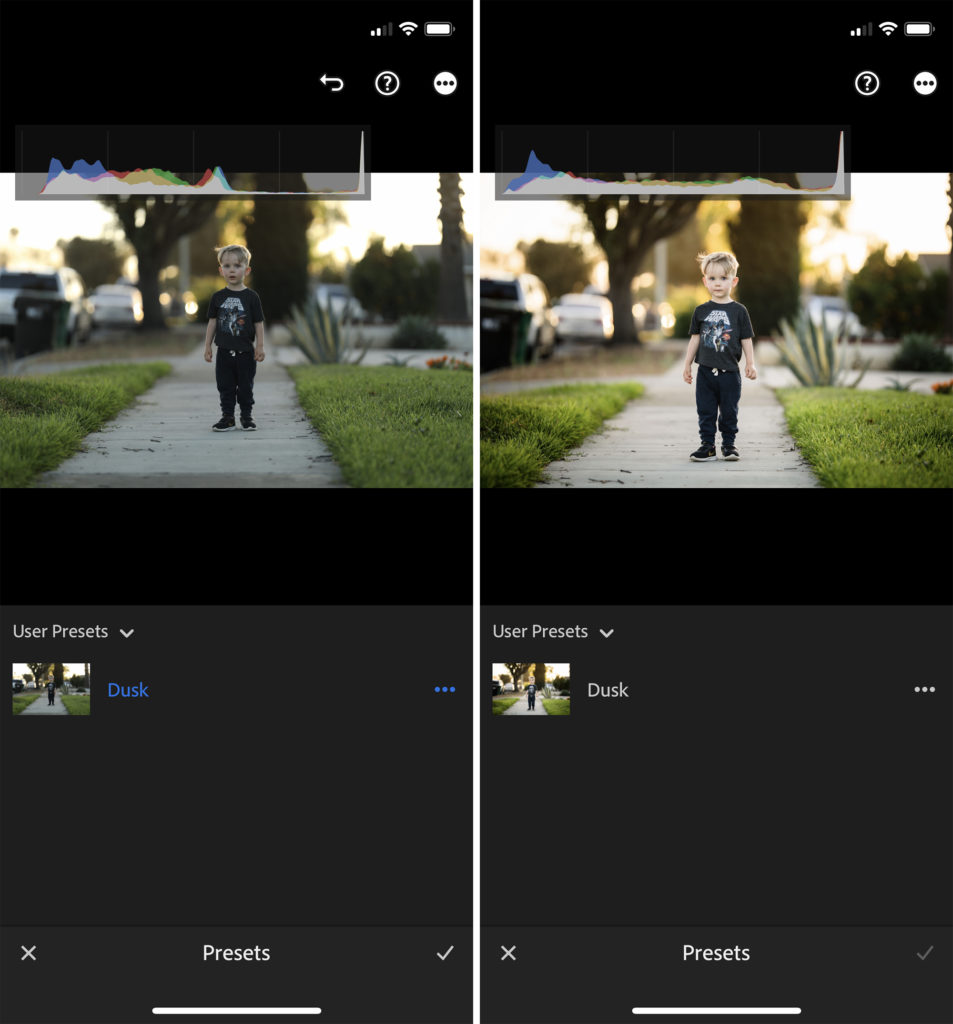
Next, select the appropriate preset group and find & apply your new preset. Tap on your preset and click on the checkmark in the lower righthand corner to apply it. Your can make additional adjustments (such as to exposure or white balance) if necessary before exporting or sharing your edited photo.
You can always sync your edited photos in Lightroom on your desktop and mobile device, which will then allow you to use your new presets on both machines.
Conclusion
We hope you enjoyed this article on how to create presets in Lightroom mobile. For more Lightroom education, be sure to see our Free Guide to Using Lightroom here on the Visual Flow site, or checkout our Mastering Lightroom workshop at slrloungeworkshops.com.
