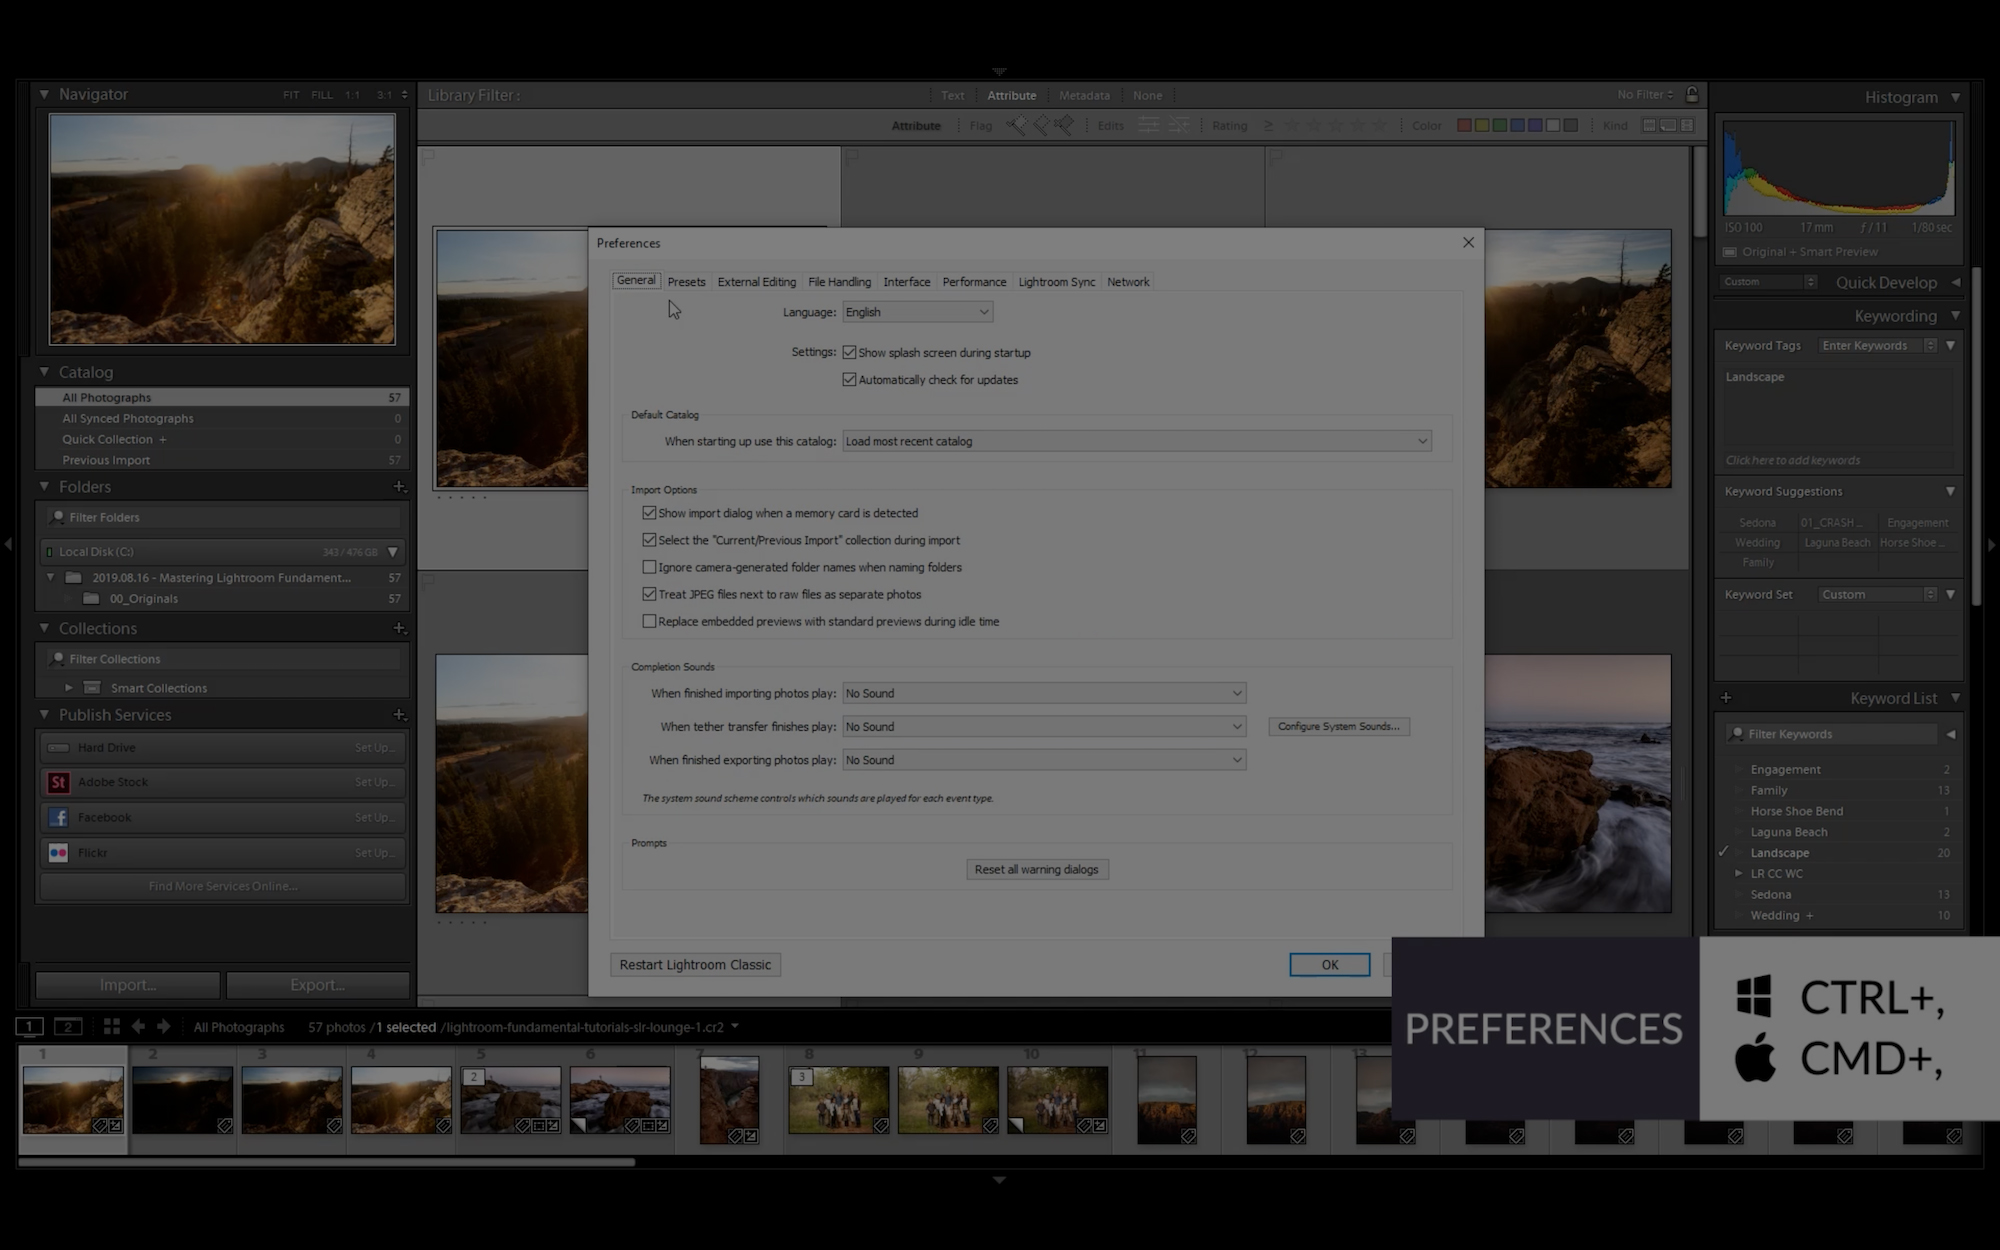
Customizing your Lightroom preferences will allow you to streamline your workflow and dial in basics like deciding which catalog you’ll see when you open Lightroom as well as other import options and miscellaneous details.
In this article, we will go over each of the tabs used to customize Lightroom preferences in the Preference Dialog Box, and we’ll focus on the options that we feel are most helpful.
This tutorial is part of our Lightroom Tips Series, where we give you simple guidance on how to use Lightroom more efficiently and effectively.
To open your preferences, press CTRL+, (Windows) or CMD+, (Mac) and start making your selections (see the picture below).
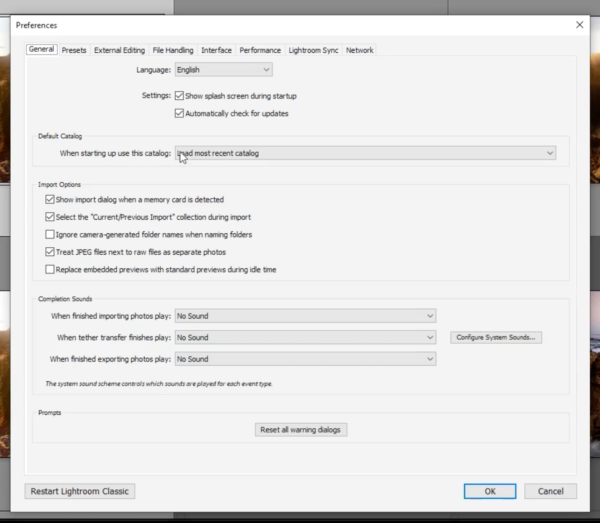
General Preference Tab for Customizing Lightroom Preferences
There are a couple important options to customize under the General Preferences tab. Among other options, choosing your Default Catalog can prove a helpful timesaver. We typically select “upload most recent catalog,” based on the premise that you will want to pick up where you left off during a previous session. Of course, these preferences are highly subjective, but we can share a few of reasons as to why we select or deselect certain options. For example, we often deselect the “show import dialog when a memory card is detected” to eliminate the task of having to respond to a reminder we’re already aware of. We suggest you fine tune your selections over time as you become more familiar with using Lightroom.

One of the more crucial Import Options is the “Treat JPEG files next to raw files as separate photos” option. The default setting for this option is inactive/unchecked. If this box is left unchecked and you shoot on both raw and JPEG files, then only the raw files will be imported and the JPEGs will be treated as duplicates.
Presets Tab for Customizing Lightroom Preferences
Under the Presets tab in the Lightroom Preferences dialog box, you can adjust your settings for how Lightroom handles your presets. In one of the options, for example, you can choose to show or hide partially compatible develop presets. What this means is, if your presets are not fully compatible with the develop module in Lightroom, then they will disappear altogether. It’s worth showing whichever presets you have available, even if they’re not fully compatible develop presets.
![]()
Our strong recommendation in the Presets tab is to uncheck the “Store presets with the catalog” option (see the image above). When checked, this option will literally store your presets with the catalog and then the presets will not be available when you open a new catalog.
External Editing Tab for Customizing Lightroom Preferences
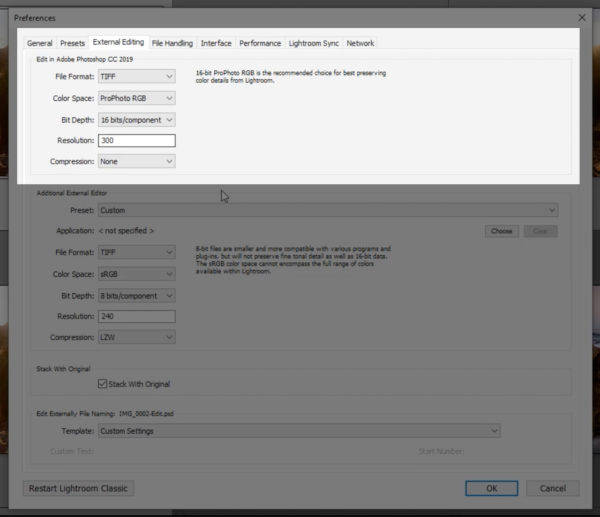
The External Editing tab (see image above) contains options that will determine how your files are exported to other editing software & applications. One of the most common “partner” apps that photographers use in congruence with the Lightroom app is Photoshop. For that reason, you should take a minute to adjust your Photoshop preferences. Of the available options, the default settings usually work well. One adjustment we tend to make is bumping the resolution from 240 up to 300 since a number of printers can print at that resolution.
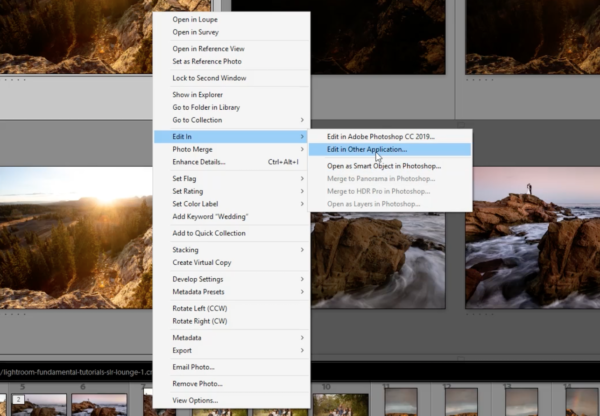
If you use other editing applications, you have the option of setting your preferences to export to those applications as well. If you right click on an image in Lightroom, you find this option under Edit In > Edit in Other Application (see the image above). You can set this preference ahead of time in the External Editing tab of the Preference Dialog Box.
File Handling Tab for Customizing Lightroom Preferences
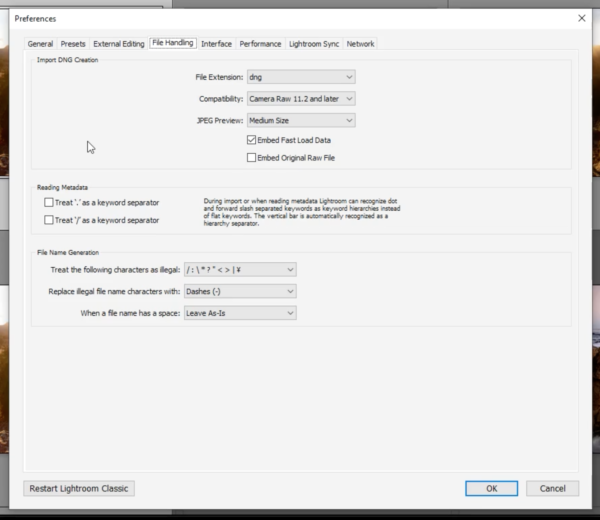
The File Handling tab (see the image above) will allow you to control “Import DNG Creation,” “Reading Metadata,” and “File Name Generation.” Importing files as DNGs has the benefit of allowing you to cull images a little more quickly in Lightroom. To further aid in speeding up the culling process, we recommend selecting “Embed Fast Load Data” to speed up your image previews in Lightroom, but we typically leave the rest of the settings in their default position.
Unless you have specific needs for metadata, we suggest leaving the remaining options set to their default settings. Our reasoning behind this decision is that the default settings are typically set up to web and file system standards and will therefore limit the number of issues we face trying to upload images to various online platforms.
Interface Tab for Customizing Lightroom Preferences
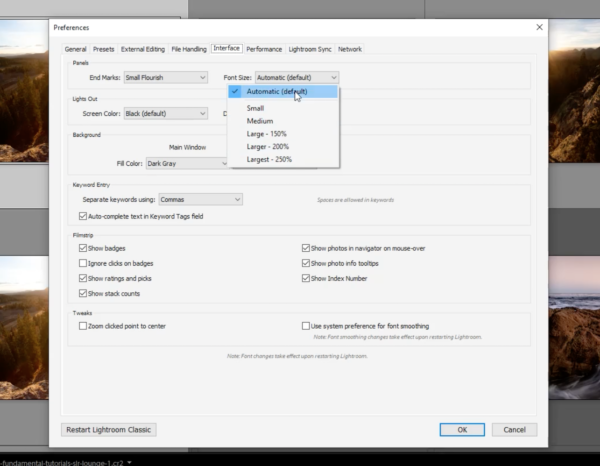
The Interface tab allows us to customize specific elements in our panels, lights out settings, background, etc. While these options are generally cosmetic (such as adding flourishes to the bottom of your panels), some can prove quite helpful.

If you are in the habit of keywording your images, for example, the Keyword Entry option to separate keywords by commas (as opposed to spaces) is helpful. If you choose to separate keywords by spaces, then a keyword phrase such as “Horse Shoe Bend” will show as three separate keywords as opposed to one compound keyword entry.

As you can see in the image above, we take a minimalist approach to many of our settings, which includes our Filmstrip option under the Interface tab. We leave “Show ratings and picks” selected to aid in the culling process and the index number can prove helpful as well.

Be sure to select the “Zoom clicked point to center” under the Tweaks option. With this preference selected, the image will zoom into whichever point you click on within an image; this feature is helpful for quickly previewing a specific area in a photograph, as opposed to zooming in and dragging the image over until you locate the area you’re trying to preview.
Performance Tab for Customizing Lightroom Preferences
Lightroom is not the most optimized editing application, but there are adjustments you can make to speed things up. The performance tab is a go-to for doing just that. Please see this article on how to speed up Lightroom for more information regarding the Performance tab.
Lightroom Sync Tab for Customizing Lightroom Preferences
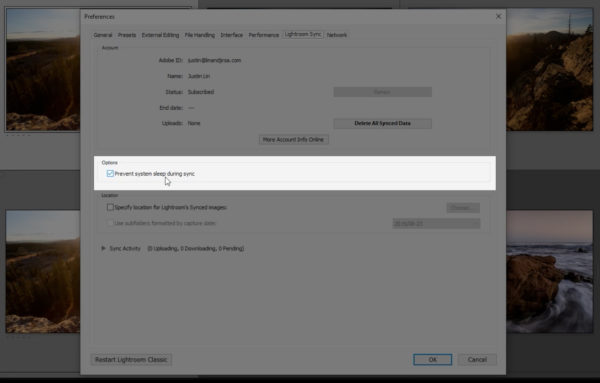
Most of the options found in the Lightroom Sync tab are good as is, but make sure to select the “Prevent system sleep during sync” option to avoid any mishaps due to your computer falling asleep while syncing files.
Network Tab for Customizing Lightroom Preferences
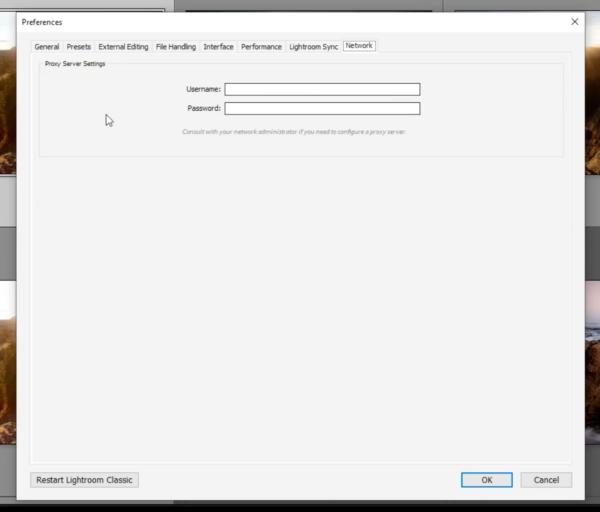
If you’re in a position to need this function, you likely already know how to set it up. For most of us, this tab is unnecessary to fill out.
More Adobe Lightroom Tutorials and Workshops
You’ll find our complete workshop on Mastering Lightroom here.
