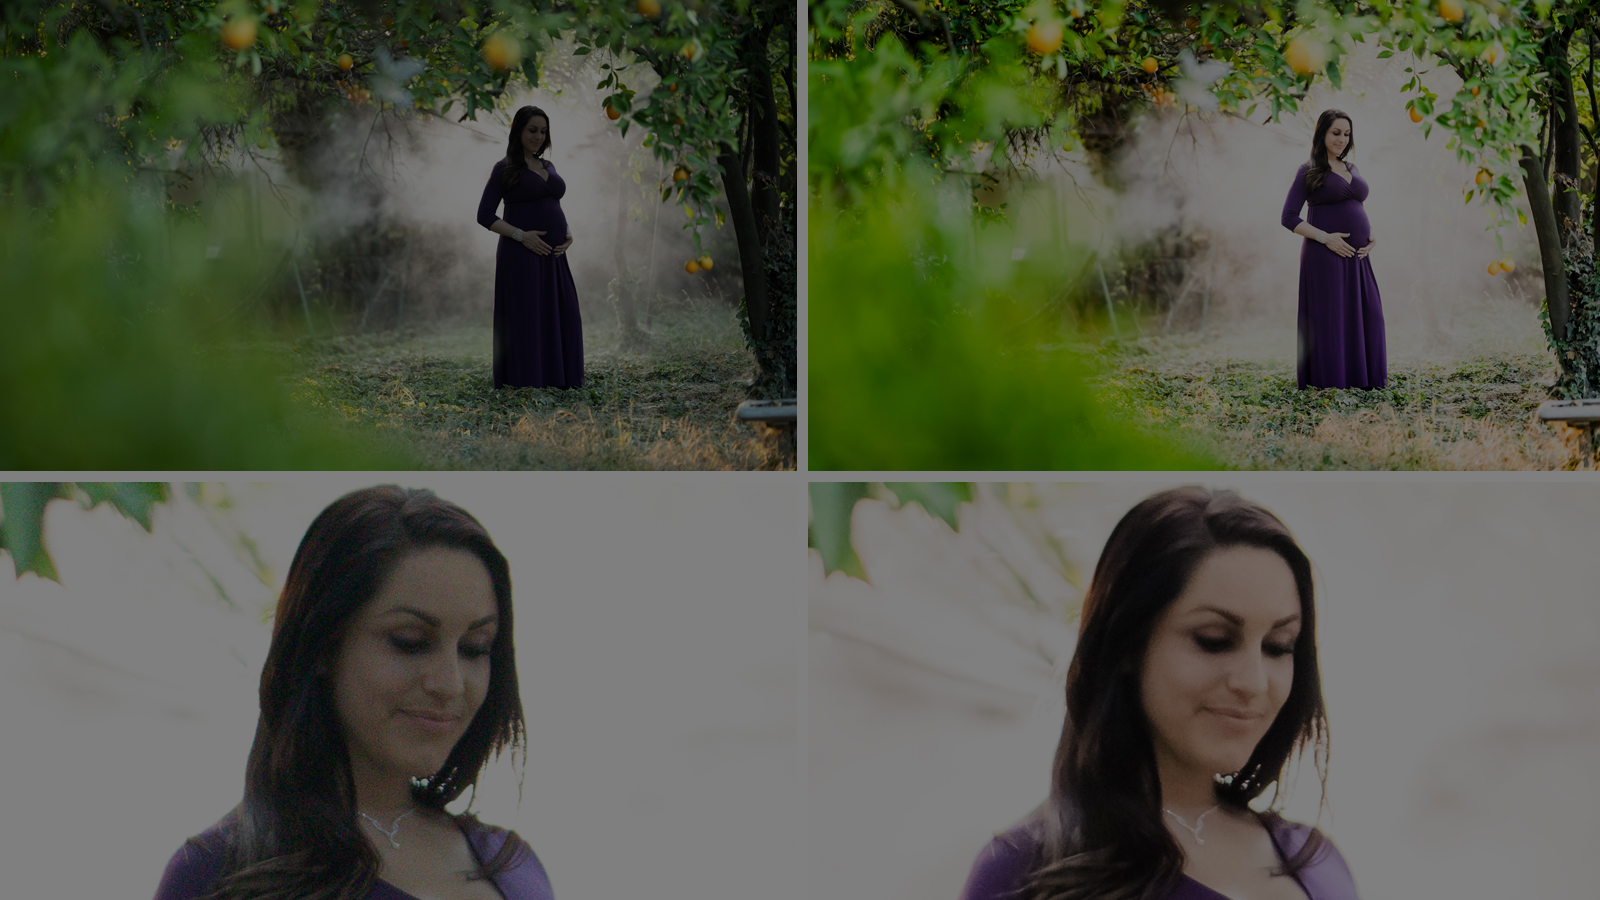
Have you ever tried to save an underexposed photo in Lightroom, only to find that the image looked too grainy? Have you ever captured a scene at a very high ISO, one that you’ve never used before, and seen lots of grain everywhere?
That photographic grain, or image “noise” in the digital photography realm, occurs when your camera’s image sensor is pushed to the limits of its dynamic range, or beyond. This commonly occurs in photos captured in low light and at high ISOs; however, it can happen in daytime and with low ISO images, too!
Image sensors have come a long way in terms of matching the dynamic range of the human eye (which ranges between 10-14 stops of light), but noise is still very much an issue in tricky, challenging lighting conditions. Luckily, we can remove noise in Lightroom with just a few steps.
Types of Noise
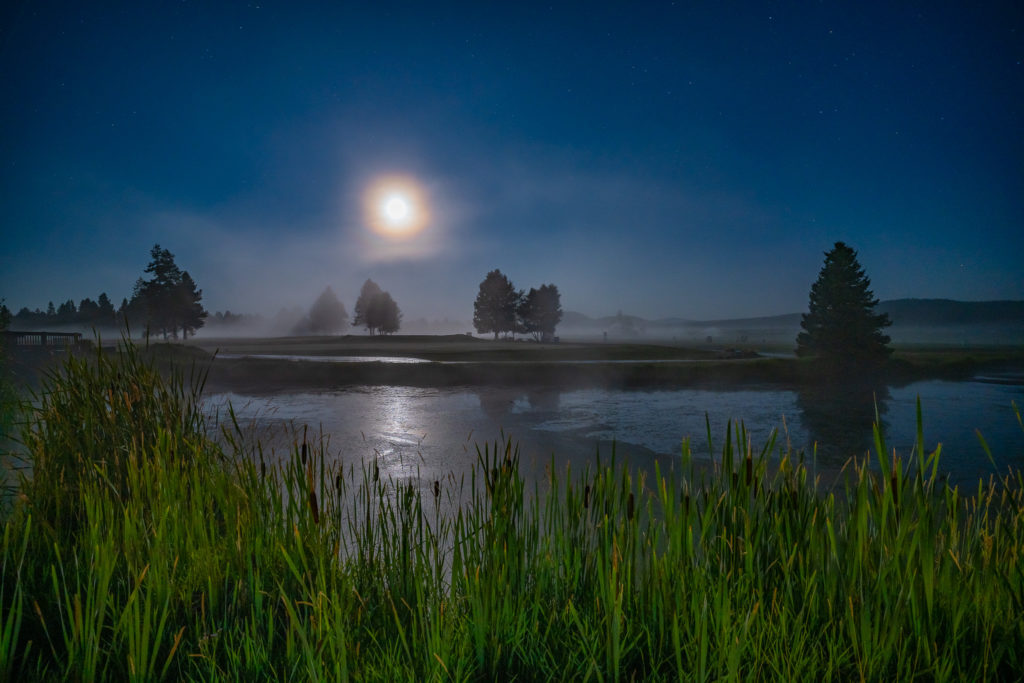
Before we jump into Lightroom, let’s identify the two main types of noise we’ll need to look for and remove. Having a firm grasp of these two types of noise will help you understand how your image will be affected by the adjustments you make.
1. Luminance Noise
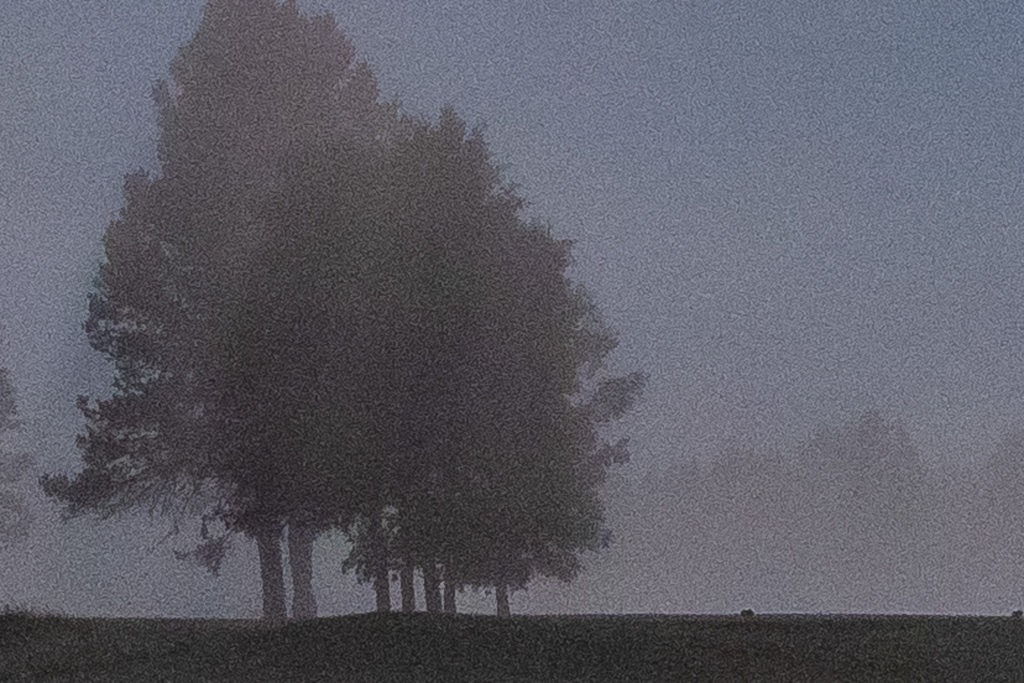
Luminance noise is often compared to film grain. The most common reason for luminance noise appearing in your photo is shooting with high ISO. These days, that means ISO 1600 or higher, although performance varies from camera to camera. You’ll recognize luminance noise because it’s mostly distributed evenly across an image.
In this image, the ISO was set to 800, and it was also a very slow exposure (four whole seconds), so it is a perfect situation for seeing reasonable amounts of noise.
2. Color Noise
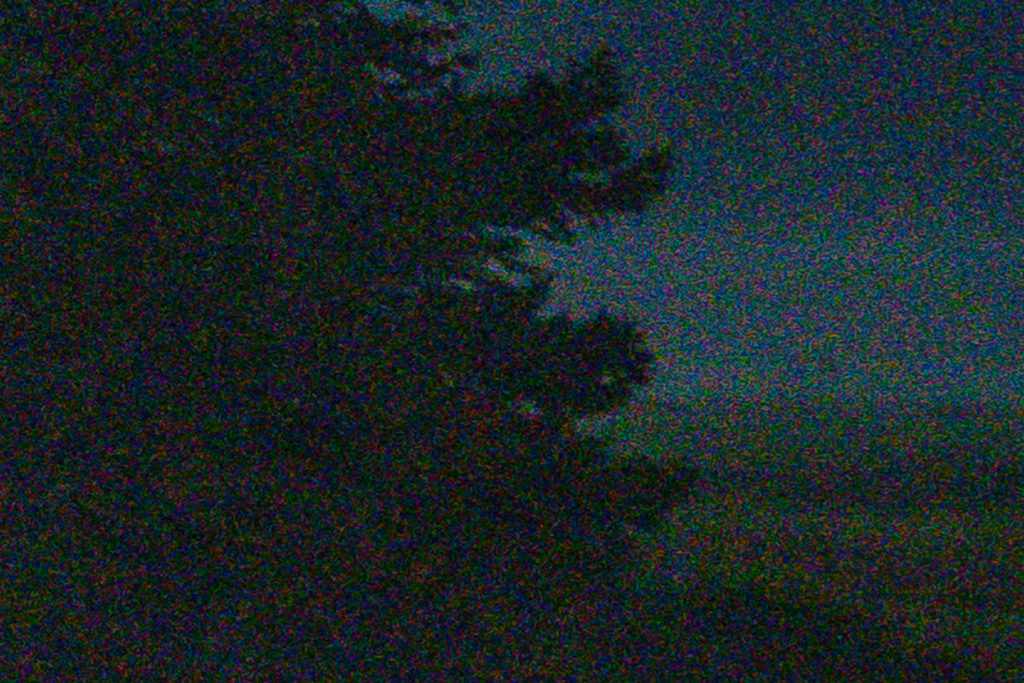
Color noise appears as small red, green, or blue dots, mostly visible in the shadow areas of your images. Long exposures (1+ seconds) and underexposure tend to increase the occurrence of color noise.
Pro Tip: Zoom into the shadow areas of your photos to check the noise of your images. We recommend zooming in 1:1. To do this, select “1:1” at the top of the Lightroom Navigator Panel, which is at the left of Lightroom in the Develop Module (press “D”). Then, simply click on an area of your image to zoom in 1:1. Zoom in closer if the subject is smaller in the frame.
Understanding Noise Reduction and Color Noise Reduction Adjustments
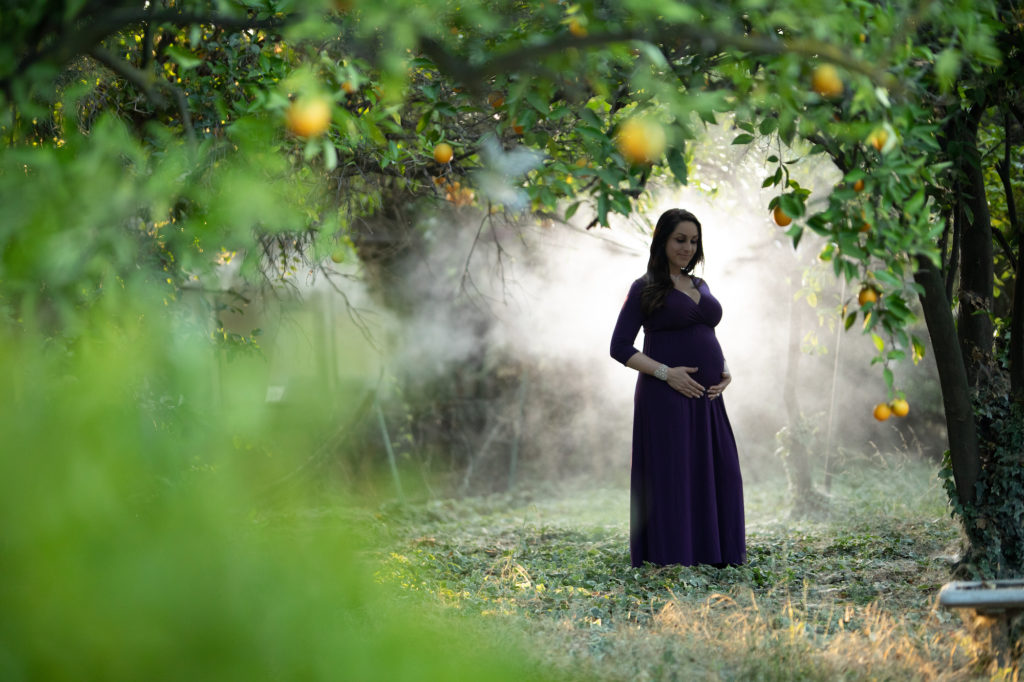
To help you understand how adjustments will affect Luminance Noise and Color Noise in your images, we will go through a portrait example captured in dim, challenging conditions. (We bumped the exposure of the original image up 1.5 stops before making the following adjustments.) This image was captured at ISO 1600, but the mistake here is the shutter speed, which was set to 1/1250. Much of the noise in this image could’ve been avoided if the shutter speed were slower, (brighter) which have then allowed for a far lower ISO, and/or a better exposure.
Pro Tip: Indeed, even if you don’t change your ISO you can still see better noise performance (“cleaner” images) at high ISOs, if your exposure is bright, instead of under-exposed and then boosted in Lightroom! Well-exposed images, and especially highlights, can have a little less noise, at any ISO.
Noise Reduction Slider
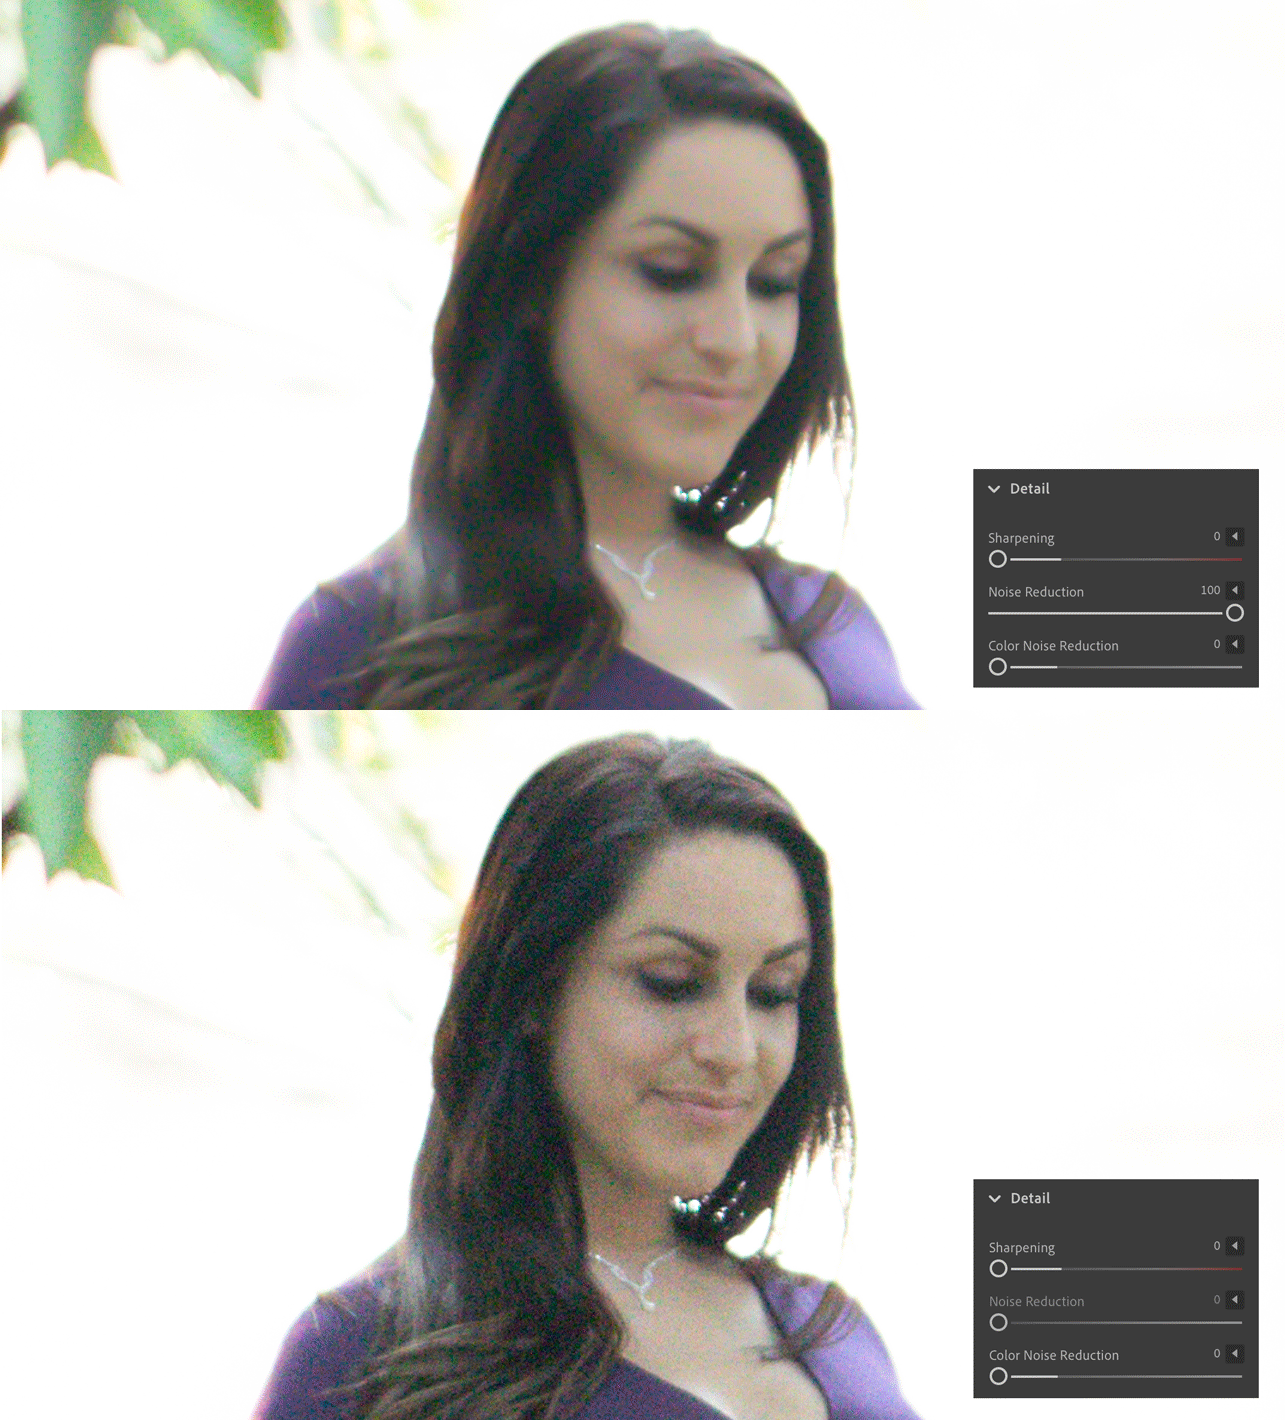
If we pull the Noise Reduction slider all the way to the right, it will reduce the overall noise that we see in the shadows. In our example, that would our subject’s face. As you can see below, the overall noise has been significantly reduced. While this slider can reduce the overall noise we see in the shadows, however, going too far with it will create an overly smooth, painterly effect.
Color Noise Reduction Slider
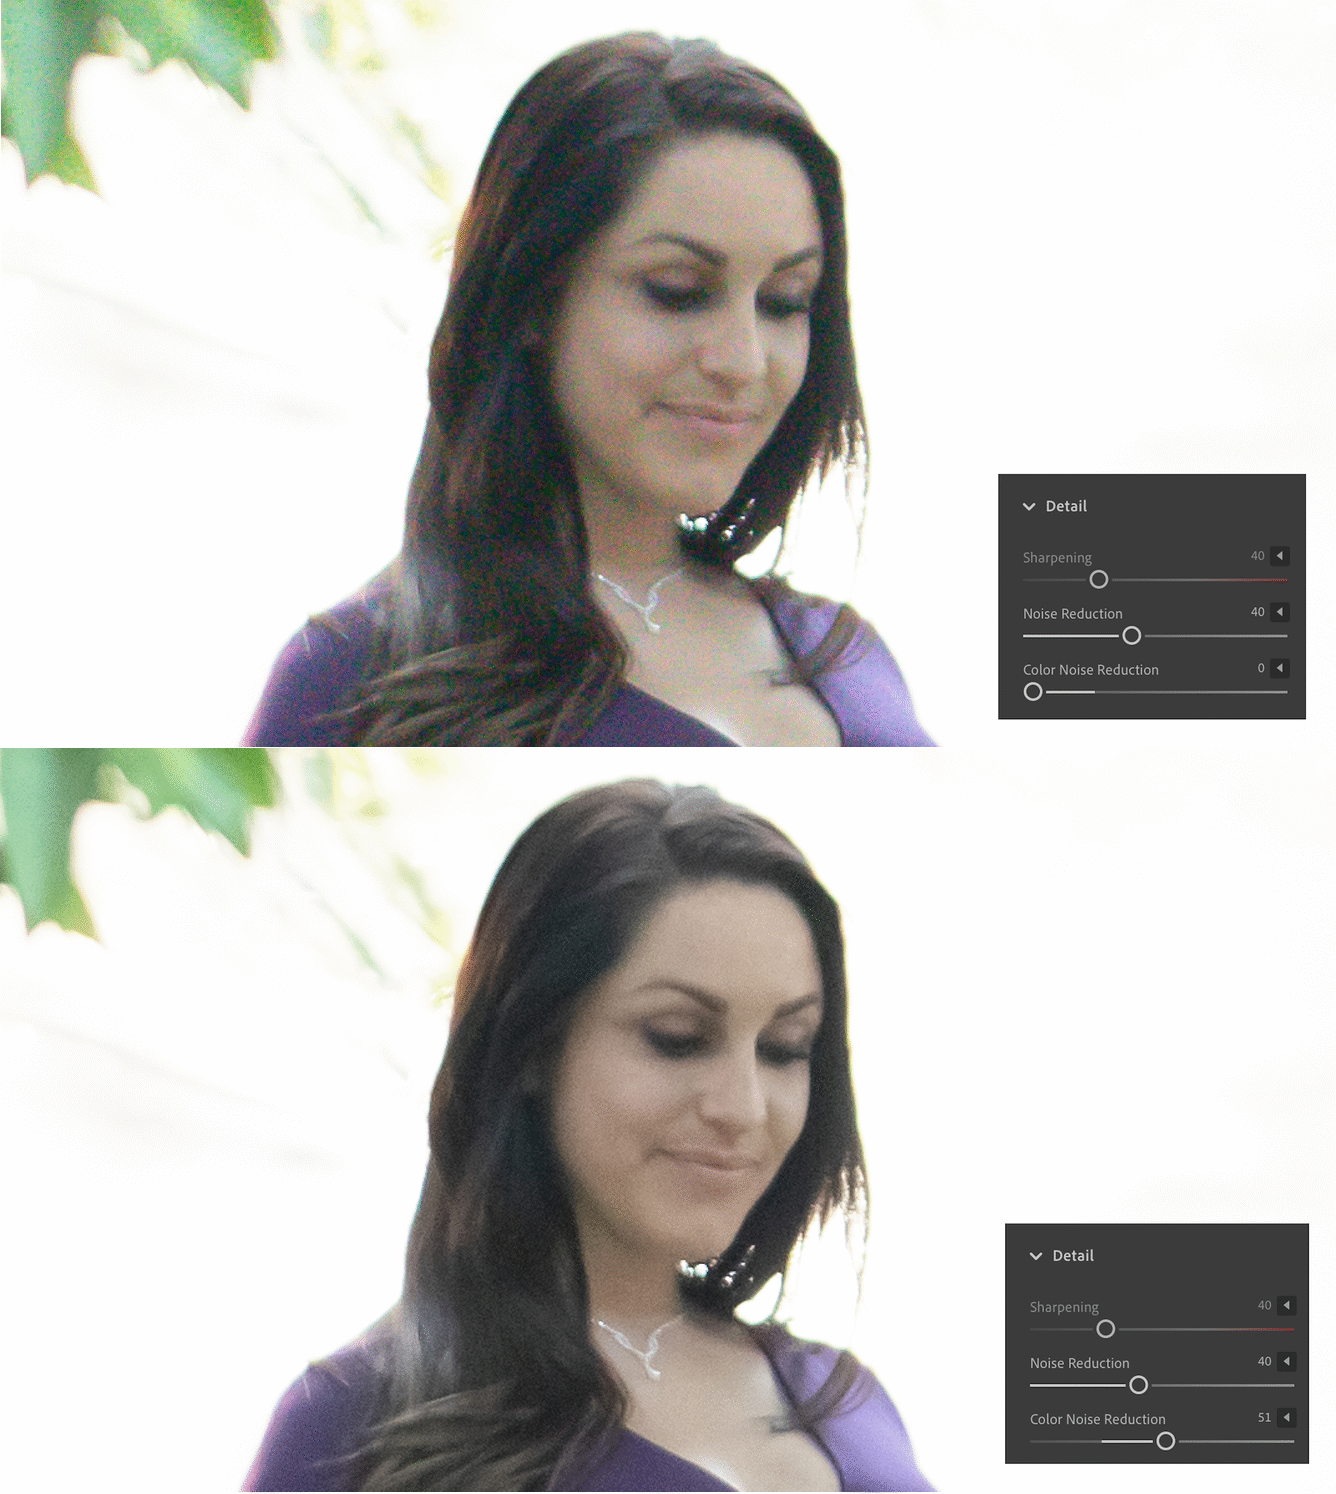
We can see Color Noise, which are the shifting colors in the little flecks, right next to each other. To remove the Color Noise, we are going to pull the Color Noise Reduction slider to the right. The higher we bring Color up, the fewer colored flecks we will see. When we take Color Noise Reduction slider all the way down to zero, we would see the different colored flecks much more prominently.
Reducing Noise in Lightroom
When reducing noise in Lightroom, we need to strike a balance between Sharpening, Luminance, and Contrast. To begin, open the Detail Panel within the Development Panel located to the right in Lightroom.
Adjusting Noise Reduction
Typically, we can leave Luminance at around 30-40. We recommend that you stick with this range unless an image absolutely needs Luminance to be higher.
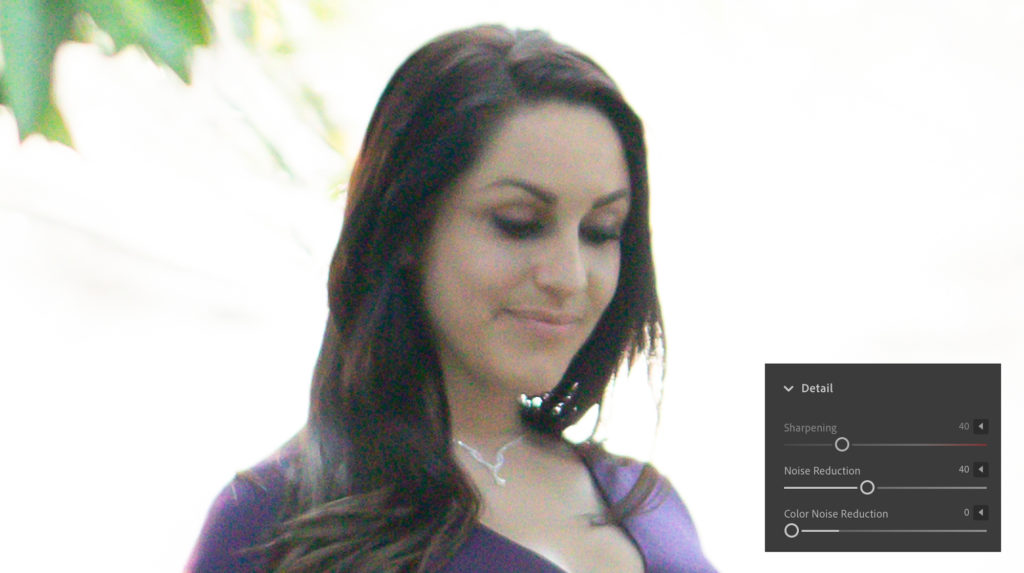
For our image, we will leave Luminance at 40.
Adjusting Color Noise Reduction
In the Noise Reduction settings, Color comes defaulted at 25. This is usually good enough, so we can leave it alone. However, if you shot your image at a very high ISO, it would be a good idea to bump up Color to around 50.
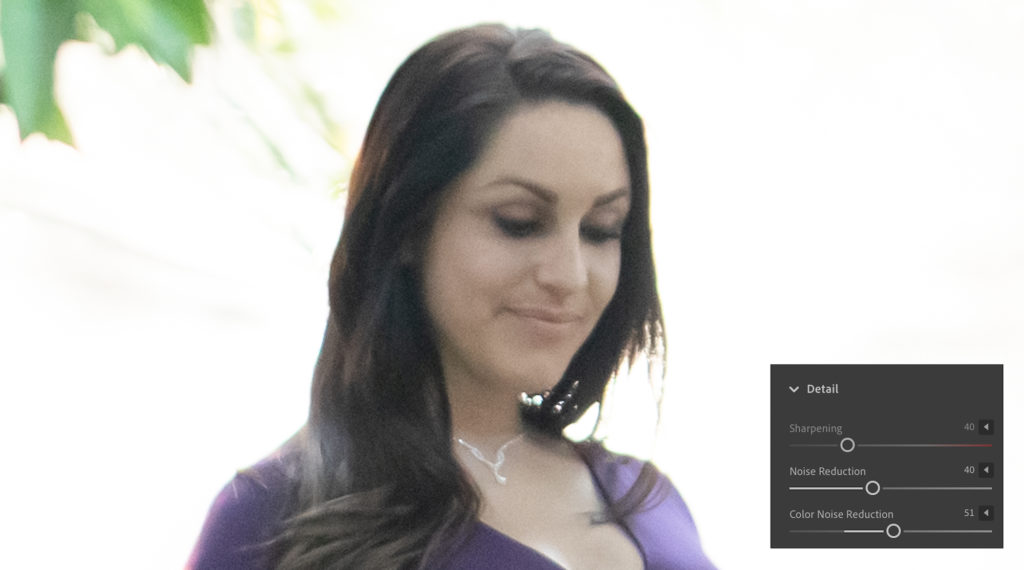
Since this image was shot at a high ISO, we will bring Color up to 50.
Sharpening an Image
After we have reduced the noise, we need to sharpen our image. For our image, we will adjust the Sharpening up to 50. After sharpening our image, we may need to adjust the Noise Reduction settings in order to get the best effect out of our image. We bumped our Noise reduction up to 45.
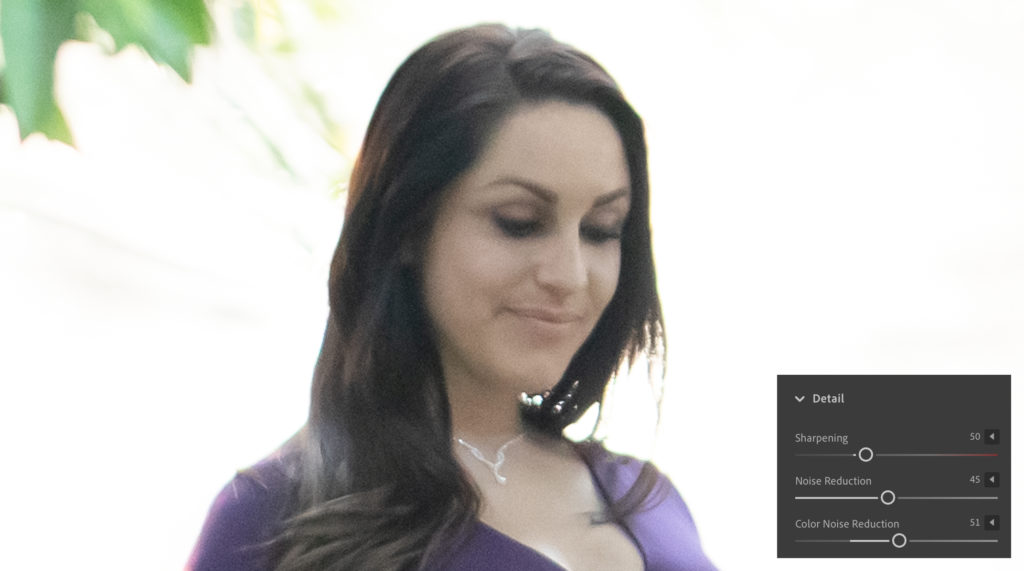
Although there is still some grain in our final image, this type of grain will not look bad when we print the image out.
Conclusion & Learn More!
The first lesson should be to check your settings in-camera to avoid making extra adjustments, if possible. In the even that you do need to remove noise in Lightroom, however, it’s good to know that you can take a grainy image shot at a relatively high ISO and turn it into an image that is deliverable. Lightroom’s Noise Reduction settings are extremely powerful, so be careful when editing your images. However, with the correct adjustments, you can transform a grainy image into a quality image that can be printed.
For more information, see our latest Lightroom Workshop.
