Whether you use Lightroom, Capture One, or some other photo editing software, you’re going to want to familiarize yourself with presets. Once you’ve tried them, using presets will undoubtedly become a regular part of your post-production workflow. Few tools allow you to transform photos as significantly and efficiently as presets. It’s why they exist.
In this article, we’ll show you how to use presets in Lightroom.
Installing Presets in Lightroom
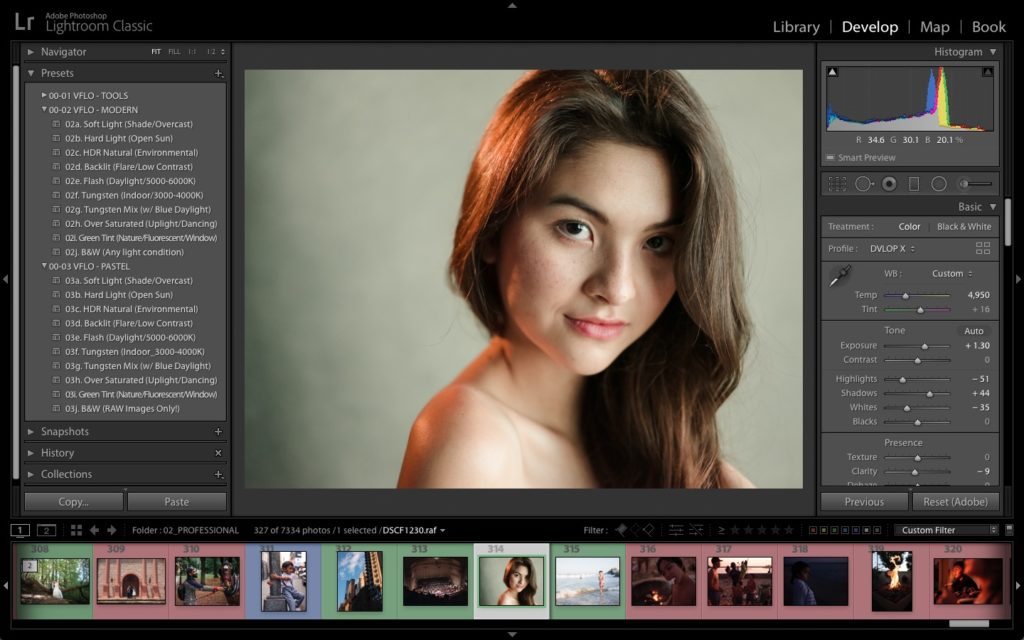
Before you can use presets, you have to either make them yourself or install them on your computer or device. Fortunately, we’ve put together a guide that outlines the steps you’ll need to follow for installing presets in both Lightroom Classic and Lightroom CC (Creative Cloud).
Opening Presets in Lightroom
Depending on which version of Lightroom you use, whether Lightroom Classic or CC, accessing the presets will vary slightly, but their functionality and results will remain the same.
Lightroom Classic
After you’ve installed your presets and restarted Lightroom, you can open them in Lightroom Classic one of a few ways:
Method 1. Go to Window > Panels > Presets
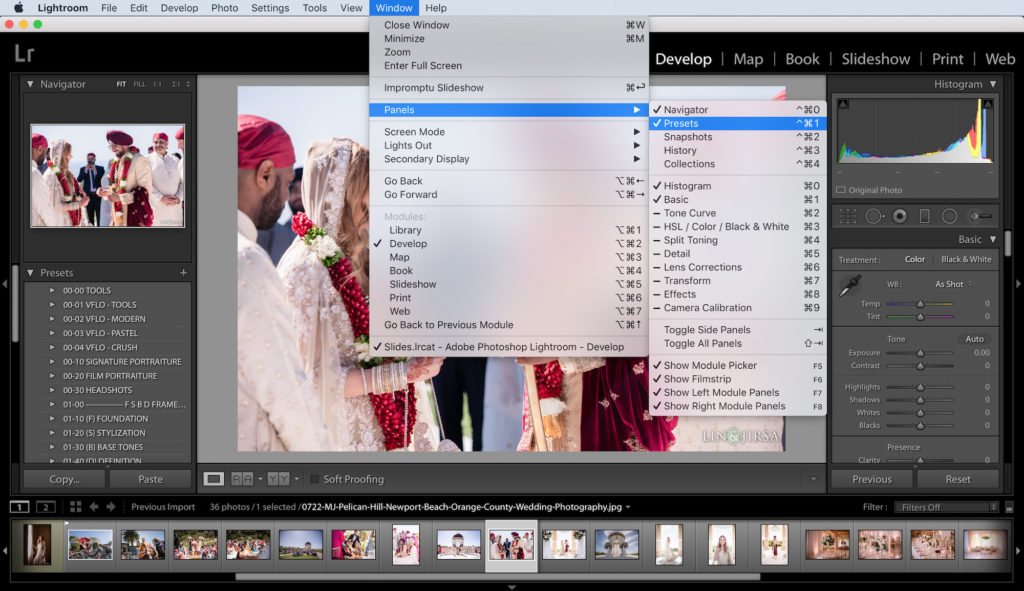
Simply follow the steps outlined above (Window > Panels > Presets) or use the shortcut (CTRL+1 for Windows or CMD+1 for Macs) to open your presets.
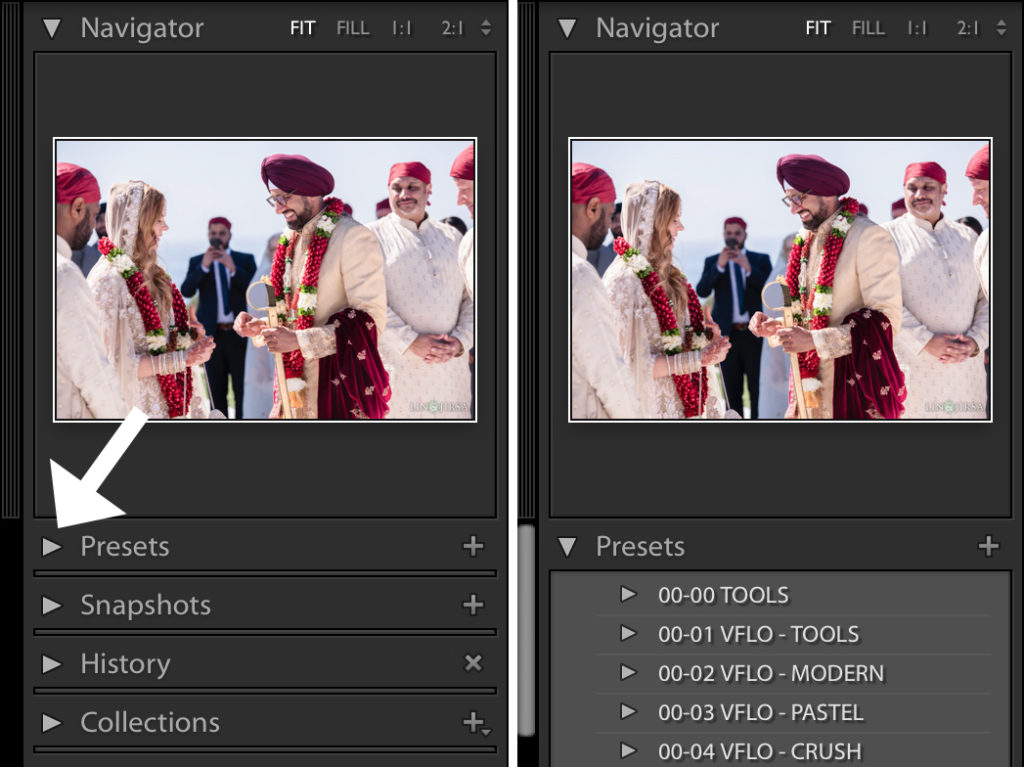
Method 2. Select the drop-down menu on the left side of the Develop Module.
You will use this method to expand your preset options, even if you use Method 1 (listed above). Click on “Presets” and then choose a preset to apply to your image (see below).
Lightroom CC
Just like with Classic, Lightroom CC offers a couple of different ways to open your presets.
Method 1. Go to View > Edit Panels > Preset Browser
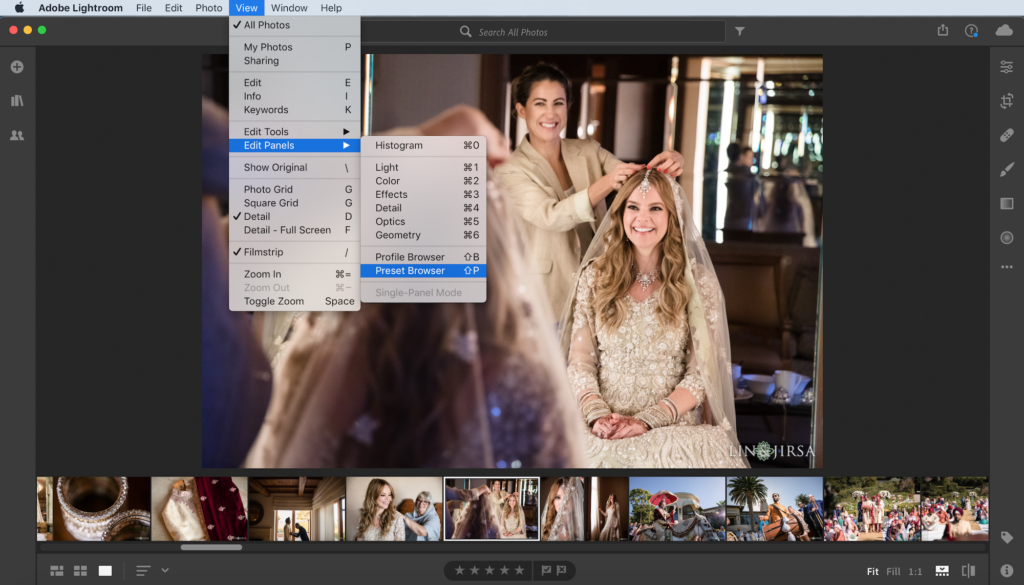
The first method for opening presets in CC is similar to opening them in Classic. You can follow the path outlined above (View > Edit Panels > Preset Browser) or use the shortcut (Shift+P).
Method 2. Click on the “Presets” Button
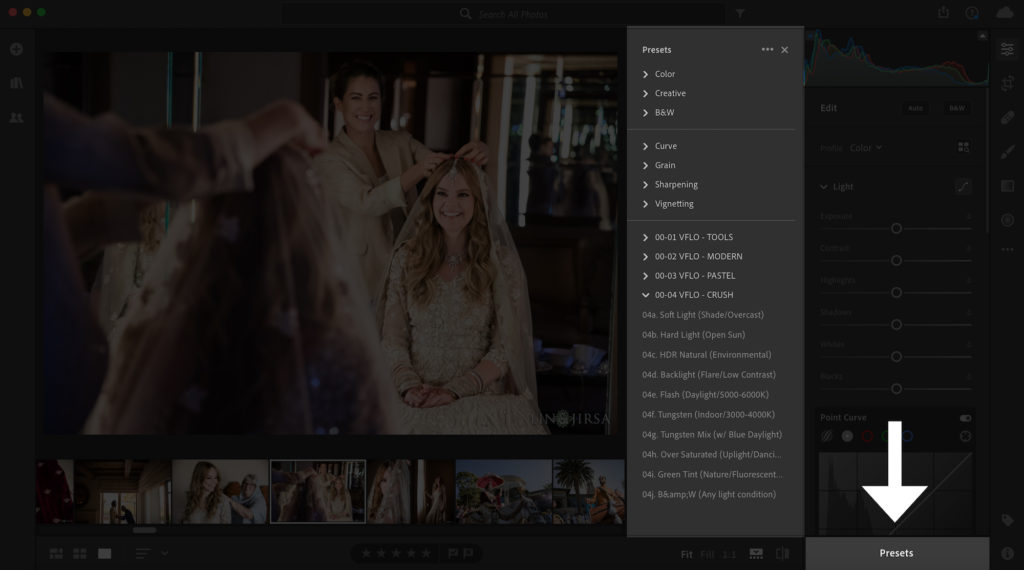
You should see a “Presets” button on the lower righthand side of the Develop module in Lightroom (illustrated in the image above). Click on that button and a new panel featuring your preset options will open up just to the left.
How to Use Lightroom Presets
In the most basic sense, using presets in Lightroom is very easy to do. With an image selected in the Develop module, hover over your list of presets (which should now be open) and click on the one you’d like to apply to your image.

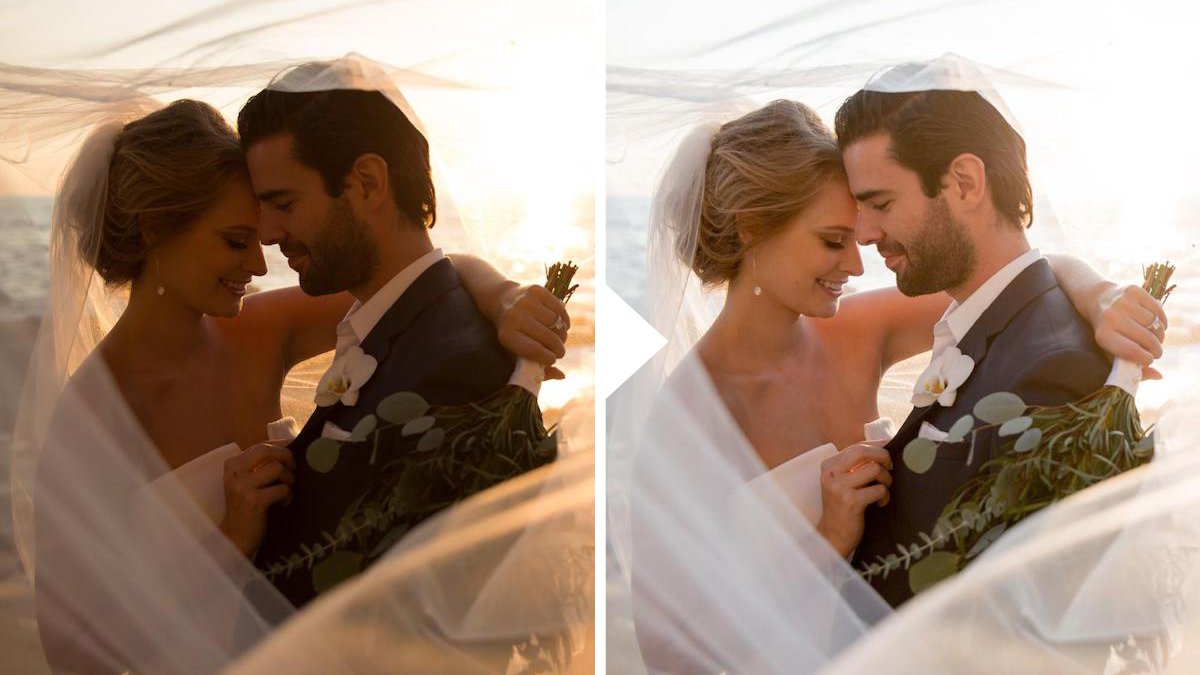
The images above show what one click of a preset (and two simple adjustments) can do to enhance your images. For this edit, we used Visual Flow > Crush > Backlight, bumped our exposure up one stop, and warmed the image using the color temperature sliders. That’s it. It took all of ten seconds. Presets remove the hassle of having to go in and make the same adjustments over and over again to get the look your after when editing your images.

Sometimes, the preset or editing technique we’re trying to use will look great in one image but pretty terrible in another (see the side-by-side images above). The reason for this is that presets are designed with settings that do not change, regardless of the unique attributes of the image we’re trying to edit. Therefore, not all presets (or techniques) work with all types of images.
Even presets that HAVE been designed to work more universally with a wide range of images, like the Visual Flow presets (which were designed around Lighting Conditions such as hard light, soft, light, mixed lighting, etc.), may require additional adjustments. Exposure and white balance, for example, tend to vary between images, so the Visual Flow presets do not alter those sliders in Lightroom. You can set and sync those settings before batch processing your keepers (see “How to Batch Process with Lightroom Presets below).
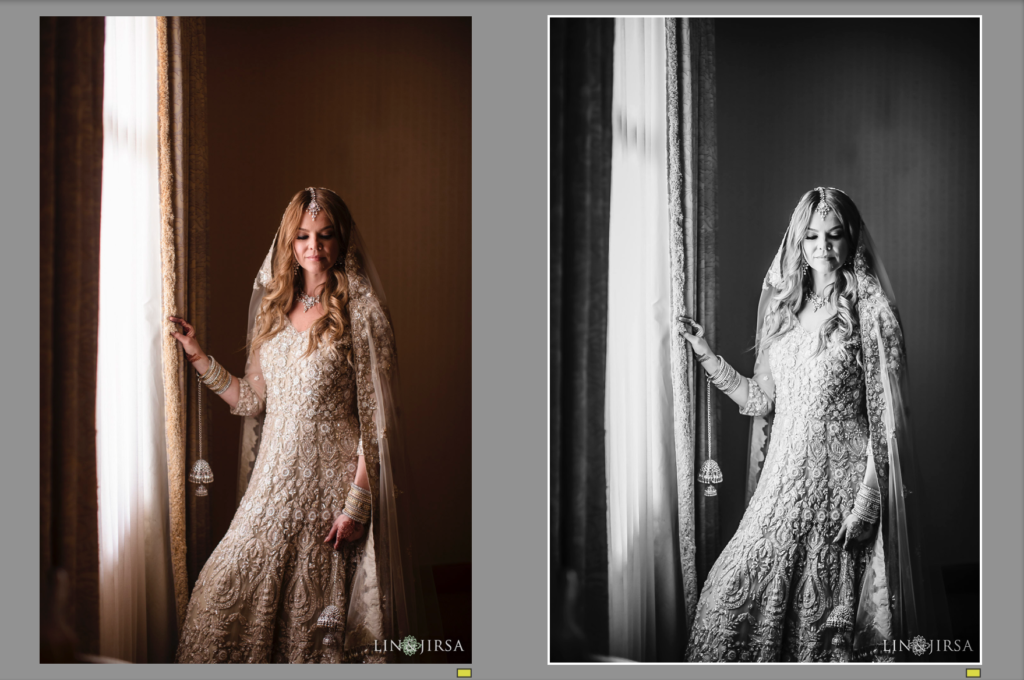
Pro Tip: Make a copy of the image your editing (CTRL+” ‘ ” for Windows or CMD+” ‘ ” for Macs) to save different looks on a single image. With Lightroom Classic, you can compare two images using Survey View in Lightroom Classic by selecting the images (click on one, and then hold to select the second image) and then pressing “N,” which will isolate and open the images in the Library module (see the image above). You can exit Survey View by clicking G for Grid or E for Loupe.
How to Batch Process with Lightroom Presets
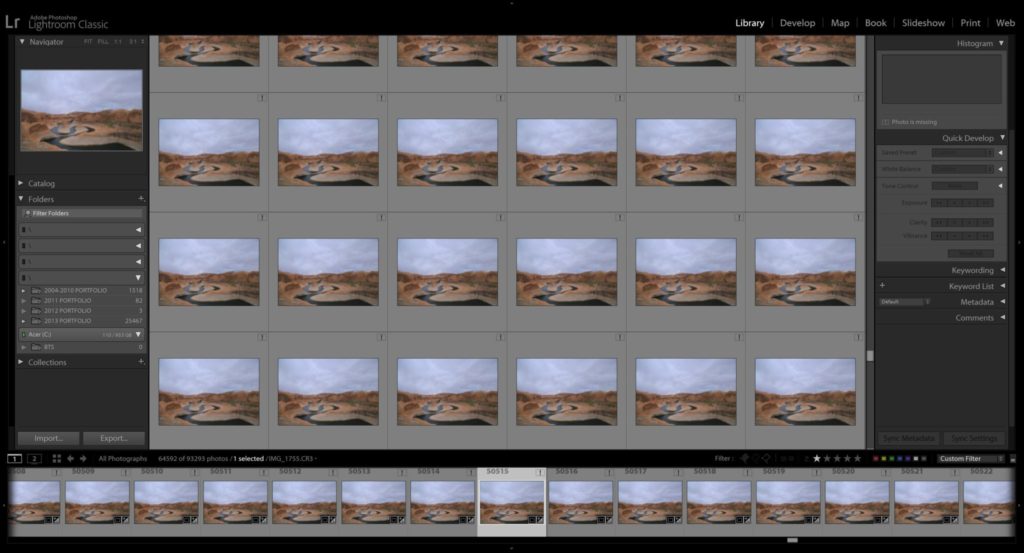
One of the best features of using presets in Lightroom is that you can batch process your photos and apply your preset across a full catalog of images. As one of Lightroom’s many tools for speeding up your workflow, batch processing represents a super efficient way to edit large numbers of photos in just a couple clicks. There are a few ways to batch process your images, and we’ve outlined each method here.
How to Create & Save Lightroom Presets
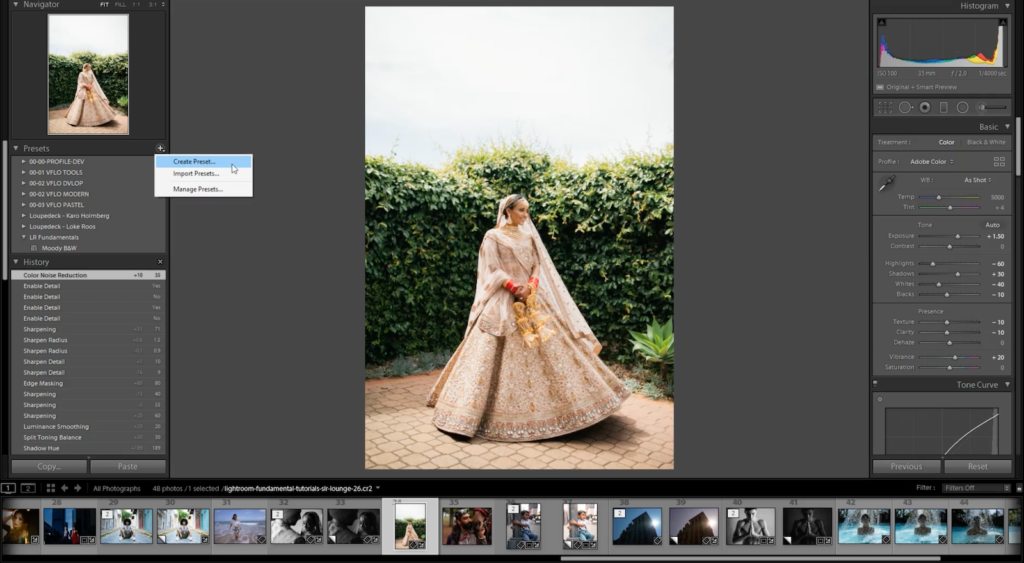
There’s a chance that even when using presets you’ll find yourself making repeated adjustments to fully dial in the edit. It might be that you consistently underexpose your images when shooting, or perhaps you love the way a preset looks but you always bump up the contrast. For such instances, Lightroom makes it easy to create (or even modify) and save presets. You can even update the same preset if you’d rather not create a new one.
In this article, we walk you step-by-step through the process of creating, modifying, and saving your own set of presets. As is true with most aspects of using Lightroom, creating your own presets is easy. Be sure to read the article to see just how easy it is.
Using Presets Vs. Brushes
You may have heard about using brushes in Lightroom, and you might be wondering how they’re similar or different from presets. Brushes work similarly in that they have already been dialed in to make specific changes for enhancing your photos, but they’re applied differently and they impact images in a different way. Whereas presets have a global effect on images, brushes are used more for making local adjustments.
You can import/use Lightroom brushes with Lightroom 4-6 or older, as well as Lightroom CC Classic. Unfortunately, at the time of publication, Lightroom brushes remain incompatible with Lightroom CC.
Conclusion
We hope you enjoyed these tips on how to use Lightroom presets. If you’re interested in learning more about how to use Lightroom, check out our Mastering Lightroom Workshop, which we designed as a complete A-Z tutorial for everything from learning the interface and catalog structure to mastering Lightroom’s raw processing tools.
