What is Lightroom Batch Processing?
Description: Batch Processing in Lightroom is the process of syncing Lightroom adjustments over multiple images.
Batch Processing Steps and Tips
Lightroom is one of the most powerful photo editing applications around, but in order to take full advantage of its potential speed, it is important to understand the basics of batch processing.
In this article, we’ll cover each of the different ways you can batch process photos in Lightroom. For example, you can copy and paste settings from one photo to another, you can synchronize settings between a whole set of photos, or you can actually edit multiple photos at once!
You can do this in the Lightroom Develop Module, of course, but you can also perform certain synchronization tasks in the Library Module, too. Alright, let’s get started!
Additional Reading For a Faster Lightroom Workflow
How To Import Photos Into Lightroom Classic And Create A Standard Import Preset
How To Create An Import Metadata Preset In Lightroom Classic
How To Quickly Cull Images In Lightroom
Speed Up Your Lightroom Workflow
There are many ways to speed up your Lightroom workflow, from creating import metadata presets, culling and keywording, or lightroom develop presets and export presets.
It is important to understand each of these features and functions, even if you decide that you don’t actually need to use all of them in your own batch processing or your overall Lightroom workflow.
In fact, you may only regularly use one or two methods; don’t feel compelled to use every single feature Lightroom has!
Batch Editing In Lightroom
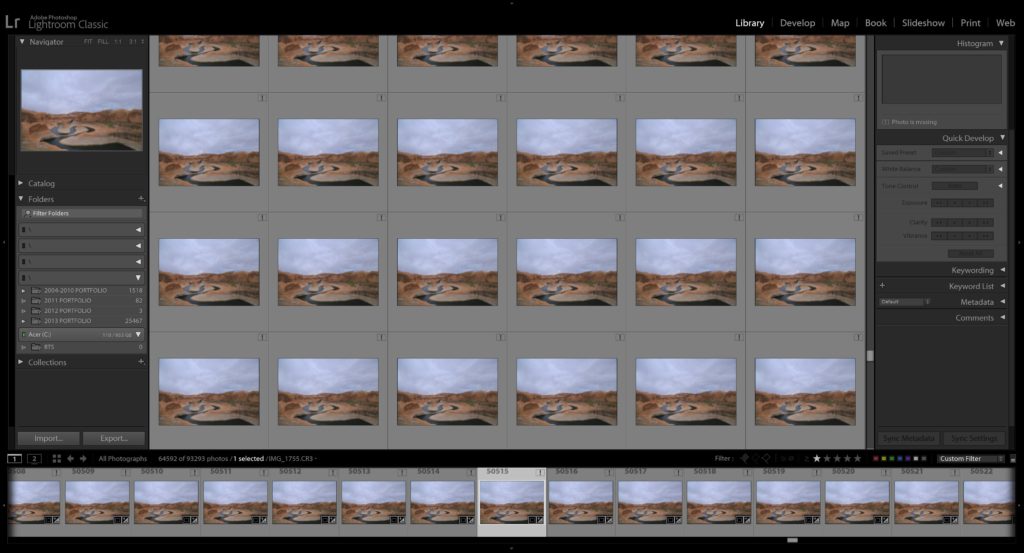
Indeed, one of the most powerful benefits of raw processing and non-destructive editing programs, of which Lightroom is a current king-of-the-hill, is the fact that you can work on multiple images at once. As a general rule, if you have two photos captured in identical lighting conditions, you should never have to perform the same editing adjustments twice!
How do you avoid repeating the same adjustments? You can either edit one photo and then synchronize those adjustments to all other photos with the same lighting conditions and exposure settings, or you can even edit all of those photos simultaneously!
This batch edit functionality is found in an option you’ll see towards the lower right corner of the Develop Module, it’s called “Sync” or “Auto Sync. (Right next to the “Reset” button.)
Copy And Paste Settings in Lightroom (Develop Module)
Something potentially confusing about Lightroom batch processing is that there are quite a few ways to “sync” your settings across multiple photos. In fact, before we even get to the button that is literally titled “Synchronize”, we should clarify that there are also buttons for “Copy” and “Paste”, too!
In Lightroom’s Develop Module, (remember, we’re talking mostly about Lightroom Classic in this article) on the lower left you will see “Copy” and “Paste” buttons. They’re at the bottom of the Navigator / Presets / History / Collections panel.
This cut-and-paste method is the most basic way to copy and paste settings in Lightroom, and to be honest, there are better ways to batch process your photos. However, if you ever need to use this function, it is very straightforward.
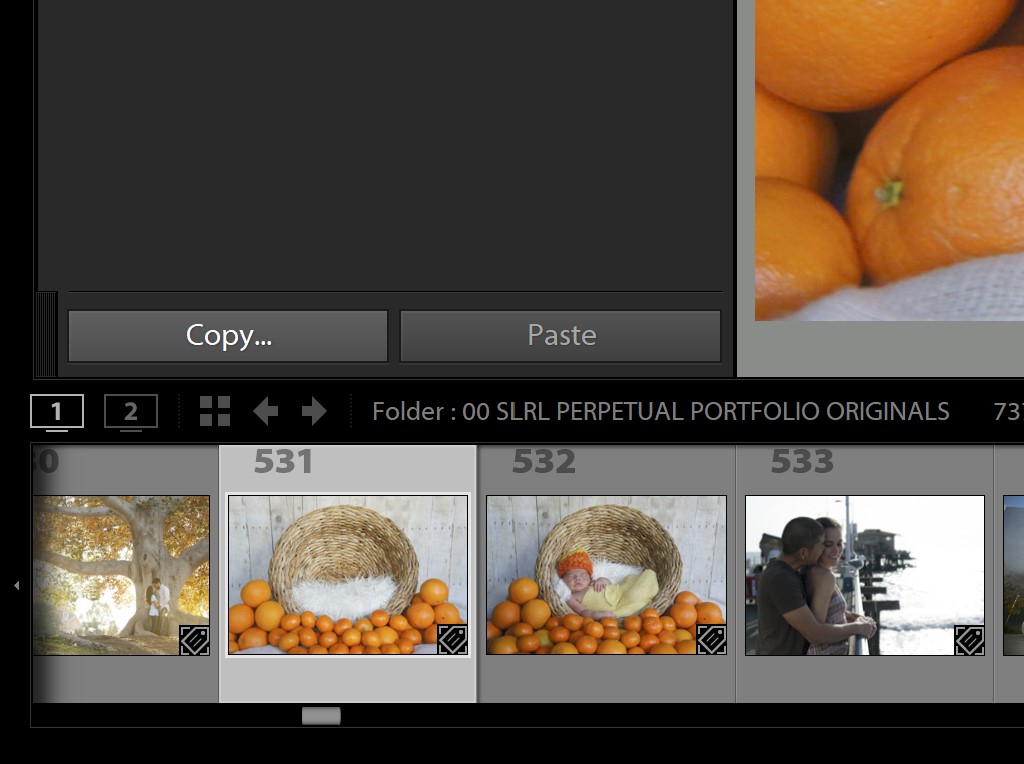
Simply select the photo you’ve edited and wish to copy settings from, select “Copy”, then check/uncheck whichever boxes’ settings you’d like to copy, and hit “Copy” in that Copy Settings window.
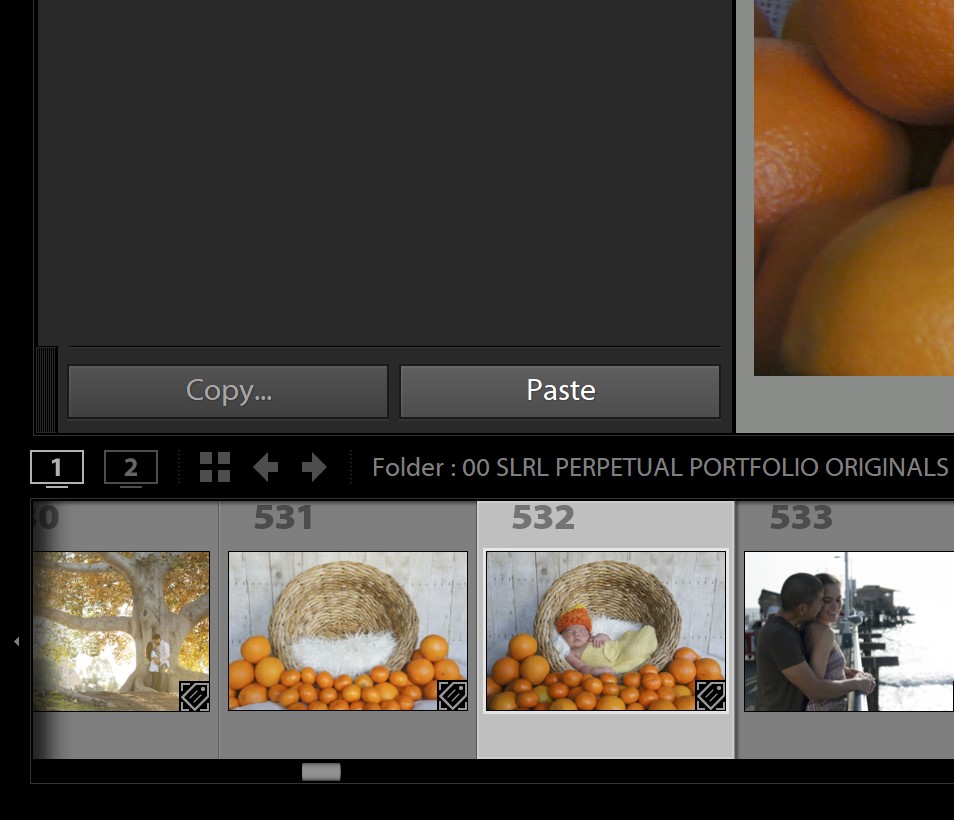
Next, select the photo you’d like to paste these settings to, and hit the “Paste” button. Note, no options will appear, it will simply paste whichever settings you’ve copied.
How To Sync Settings In Lightroom
To officially “synchronize” settings from one image to another, the process is similar, but you’ll find the button in the other corner of the Develop Module, the lower right.
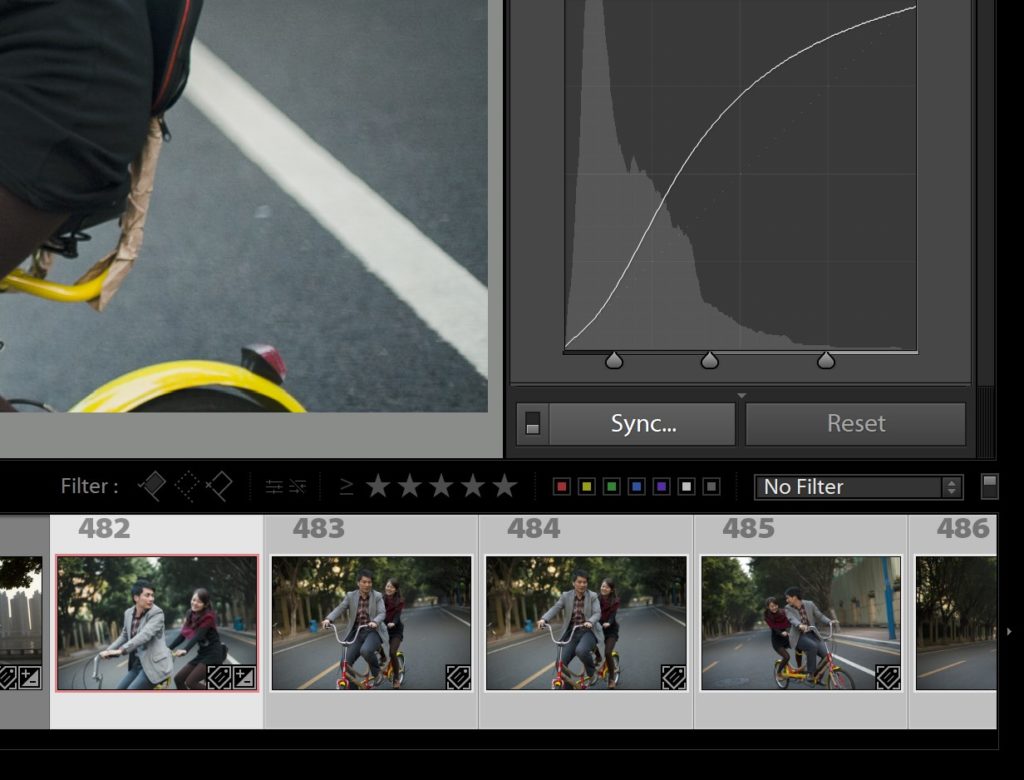
Simply select the photo with the settings that you want to copy, and then shift-click or control/command-click the photos which you want to paste those settings.
You’ll notice that the “primary” photo remains slightly more highlighted than the others, helping you make sure you don’t accidentally cut and paste the wrong settings to the wrong photos.
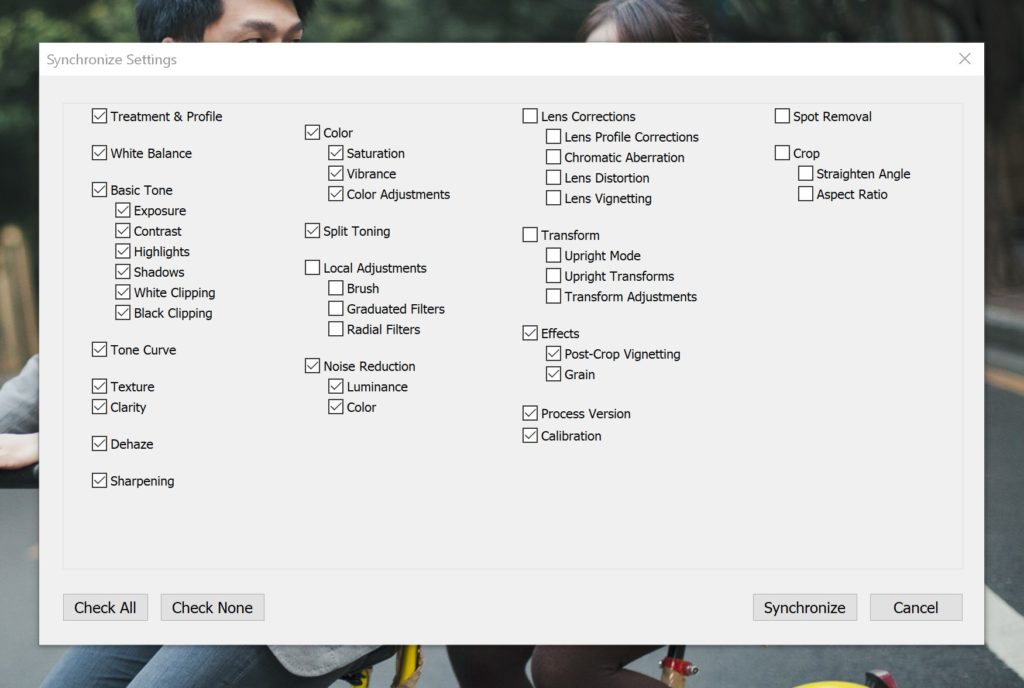
Then, simply hit the “Sync” button in the lower right corner of the Develop Module. Check or uncheck the various boxes to designate which settings you would like to copy and paste, and which settings you would like to leave un-synchronized.
Then, hit the Synchronize button!
Lightroom Auto Sync
Lastly, still in the Develop Module, if you ever need to quickly adjust certain sliders for a bunch of photos on-the-fly, then you can turn on the Auto Sync feature. It’s the little switch, the “on/off” button, at the left edge of the “Sync” button in the develop module; it will switch to “Auto Sync” when you click it:
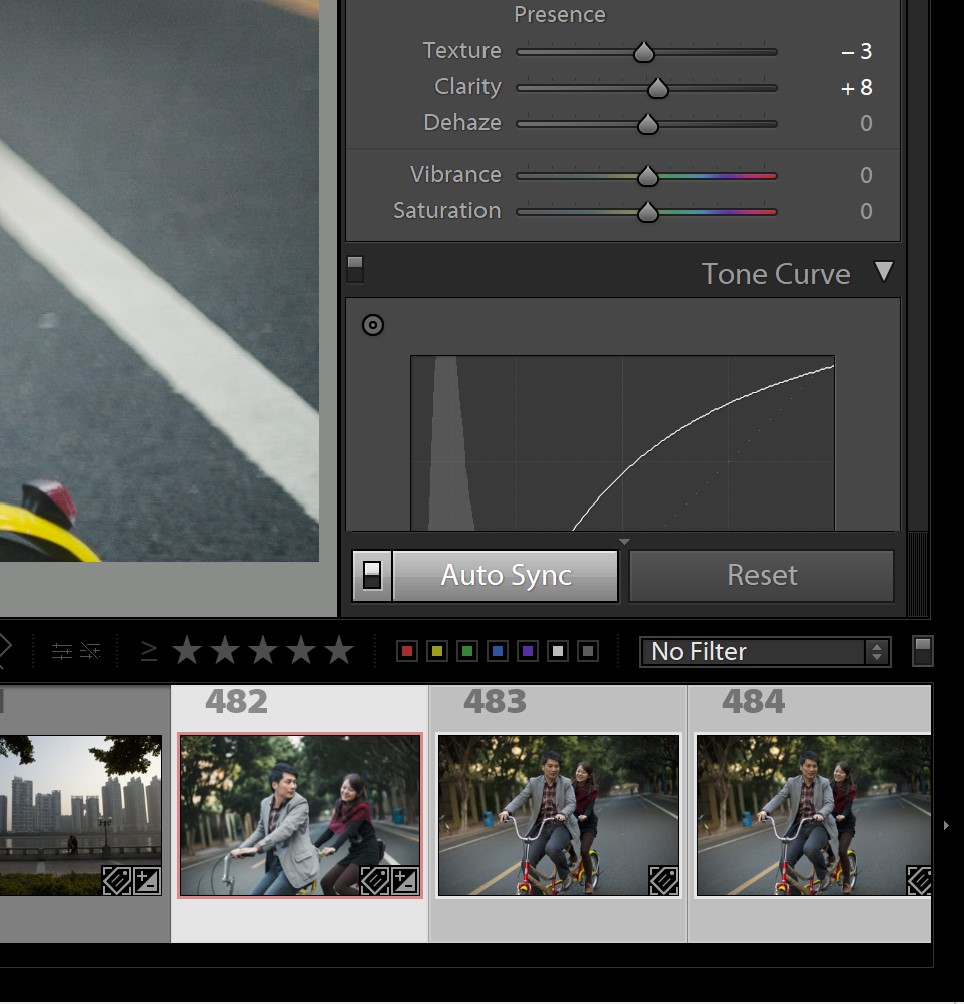
With the auto-sync feature turned on, any time you adjust a slider, it will synchronize that setting across all selected images, and it will track your adjustments as well.
Auto Sync will leave alone any sliders that you don’t adjust, though. For this reason, some photographers find it quicker to use Auto Sync while others prefer to just use the regular Synchronize function instead.
Lightroom Batch Processing & Synchronization In The Library Module?
By the way, these “Sync” buttons also exist in the Library Module, not just the Develop Module. However, they do not perform the same functions, so be careful!
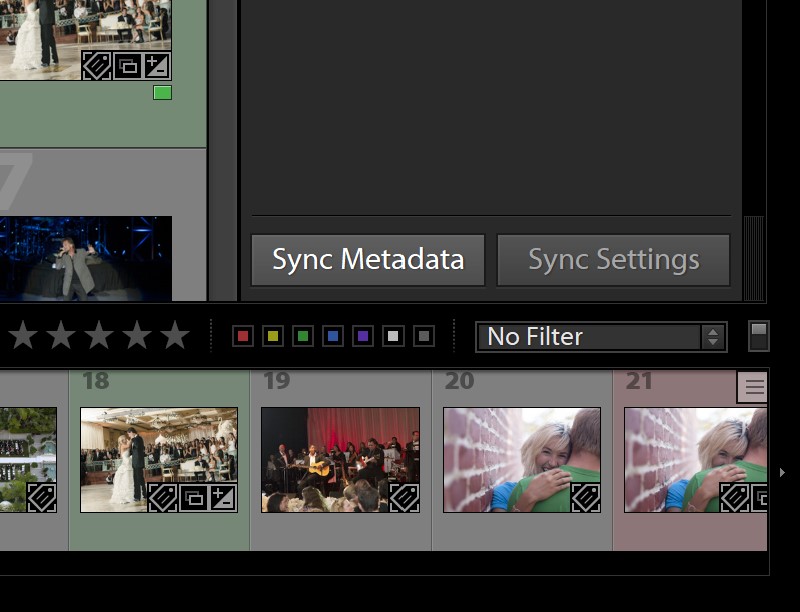
In Grid Mode of the Library Module, you’ll see two settings: Sync Metadata, and Sync Settings. These two buttons should be self-explanatory by now; use them to synchronize either your metadata or your editing adjustments, from one main selected photo to any other photos that are also selected, just like in the Develop Module.
Note, however, that if you switch from Grid Mode to Loupe Mode in the Library Module, the button “Sync Metadata” turns into a button that just says “Sync”. Don’t be confused, that button still performs a metadata synchronization function!
What about Auto Sync in the Lopue and Grid sections of the Library Module? Unfortunately, this is where things get a bit confusing, so we simply don’t recommend using these functions unless you have a specific workflow need. We’ll explain them in detail here, however, for your benefit:
- In Grid Mode, there is no “Auto Sync” button, however, if you select multiple photos and then use the Quick Develop tab to apply adjustments, then yes, you will edit multiple photos at once.
- When editing with the Quick Develop tab, your settings won’t actually be perfectly synchronized like in the Develop Module. Instead, the sliders will simply be adjusted by the same amount. (This can be useful if you want to adjust a lot of very different photos by the same amount!)
- In Loupe Mode, there is an “Auto Sync” option, and if it is turned on, you will get the same result as in Grid mode- that is, your settings will change for all selected photos, but only by the amount you input in the Quick Develop module.
Batch Processing / Exporting From Lightroom
As a final step of the process in using Lightroom efficiently, you can export as many images as you want from Lightroom all at once. For details on how this process works, check out this article here:
The Best Lightroom Export Settings For Instagram And Facebook
The Best Lightroom Export Settings For Print
Premium Video Tutorials
You can find our full workshop on Mastering Lightroom here.
