Some of you might already be familiar with Smart Previews. They were my favorite update to Lightroom 5 back in 2013 when it launched. The crazy thing is how many photographers are not using them in their workflow. It’s probably because the Smart Preview workflow was marketed as the solution to photographers that are outsourcing their work or those that need to work on images from their laptops while on the go.
In other words, there was a niche of photographers that loved the new Smart Previews, but most others ignored it altogether. This article is my attempt at convincing those of you not yet using Smart Previews, to start; it will take your workflow speed in Lightroom to a whole new level. If you’ve ever asked yourself, “Should I Build Smart Previews in Lightroom?” then you’ll want to read the article below.
Note: Smart previews are just one of many ways to speed up Lightroom. Read this article on how to speed up Lightroom for more tips.
What Are Smart Previews?
There are lots of articles online about the specifics of what exactly a Smart Preview is, but here is a general overview. When we import a RAW file into Lightroom, those file sizes might range from 20MB-100MB (24-60 megapixels and counting!) or more, depending on the camera we used.
As we try to switch from one image to another in Lightroom, the software struggles to load each new image quickly along with any edits we might have applied to it. As we move the editing (Develop Module) sliders, there might also be a tiny delay as the photo updates with the changes for us to preview. Therefore, the more we try to do, and the higher-resolution our image files are, the slower our workflow can get.
Smart Previews fixes all that by taking the large files and creating duplicate files that are about 1/15th the size. However, the new images are still RAW files, so we can edit them just as we would a typical RAW file; the only difference is now Lightroom can handle the file with ease and, as a result, the program is super responsive and quick.
Imagine you are asked to carry sandbags that weigh 25lbs. After a while, you would start to slow down. What if instead, those 25lbs bags turned into 2lbs bags? Surely you would feel rejuvenated and be able to handle those with ease. The same goes for Lightroom, giving it small Smart Previews to work with helps the program work efficiently and effectively.
How To Use Lightroom Smart Previews
Over the years, Smart Previews have gotten even easier to use, too. When they were first created, there was only one way to force Lightroom to use Smart Previews instead of the original raw files, and that was to literally disconnect your external hard drive where the original raws were stored, or to temporarily rename the folder of raw files. (Outside Lightroom, in Explorer/Finder, so as to trick Lightroom!)
Once you finished making your edits to the Smart Previews, you would have to reconnect your external hard drive, or re-sync the folder. Then, you could export full-res JPG/TIF etc image files.
Today, this process is all taken care of for you, by simply checking a box in your Lightroom Preferences. Under the Performance Tab, check the box next to “Use Smart Previews instead of Originals for image editing”. Then, Lightroom will automatically use Smart Previews when you’re working in the Develop Module, if you create/render them, of course.

How To Generate Smart Previews In Lightroom
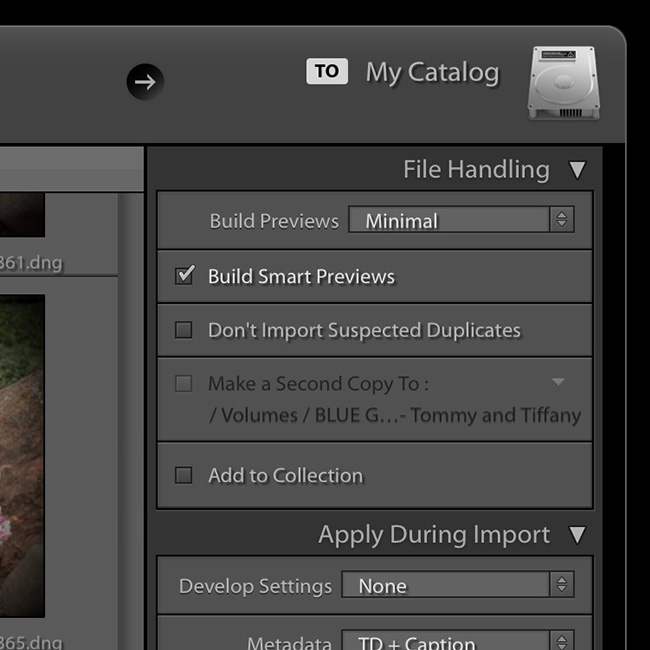
There are two main ways to generate Smart Previews for your photos. One is at the time of import; as you import your photos into Lightroom, you can select the box in the right-hand menu to generate the previews immediately upon importing the files. The check box is located under the “File Handling” dialog box.
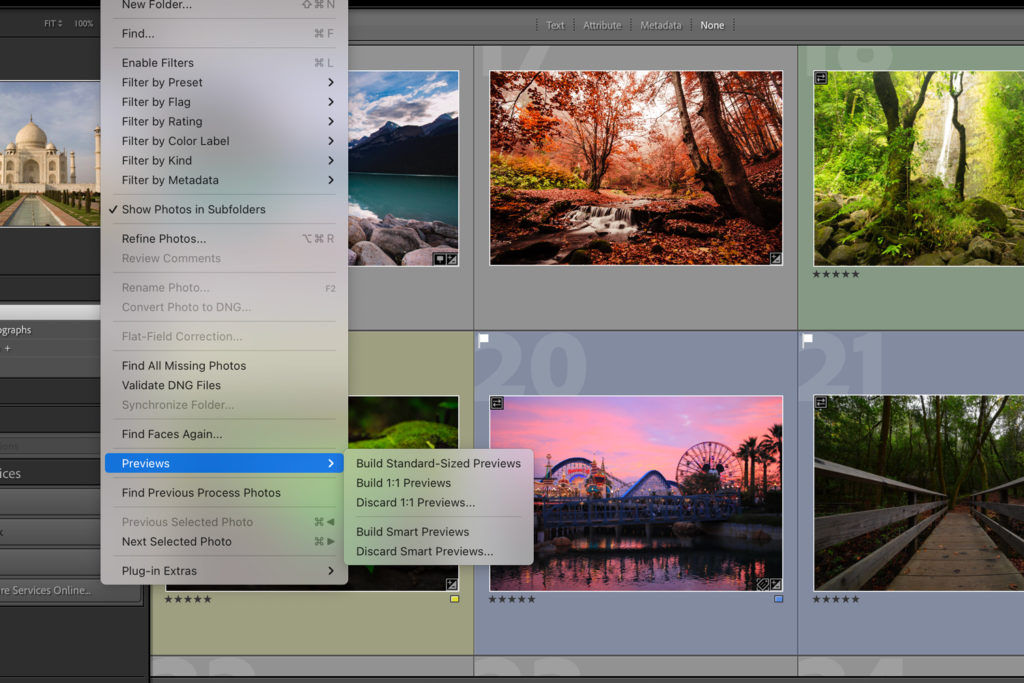
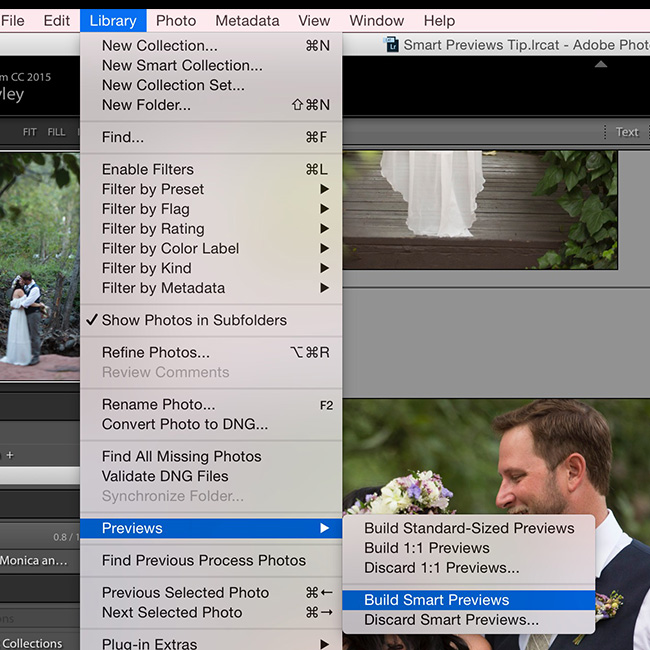
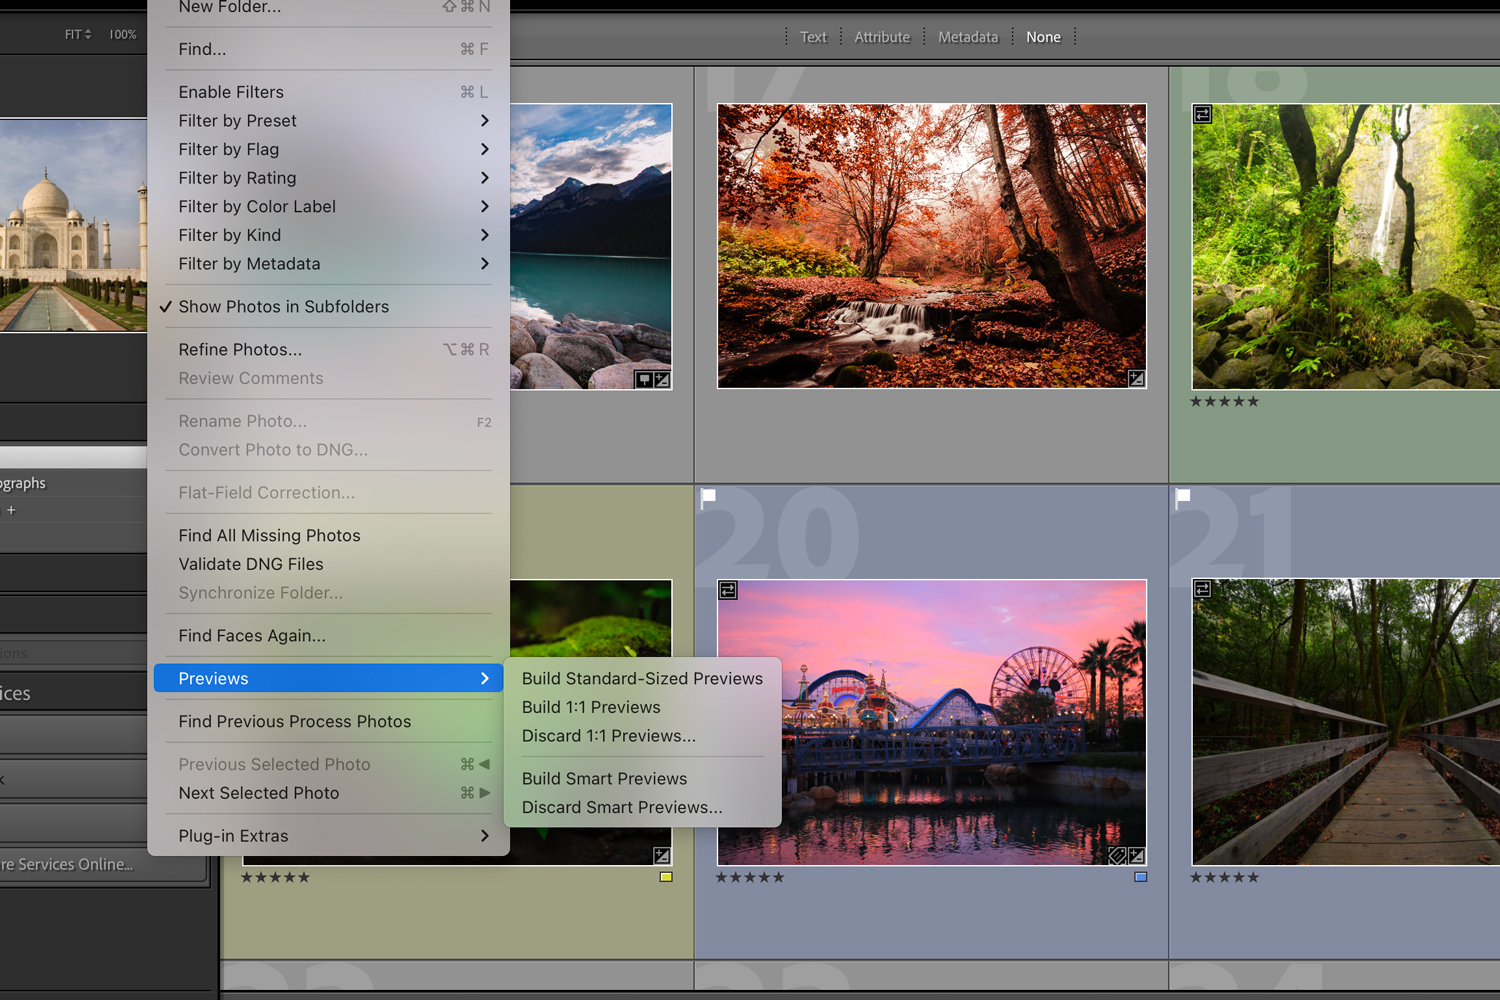
The second option is by selecting the images in your folder and while in the Library Module click on “Library” on the top menu bar, then choose Previews > Build Smart Previews. The process will then begin, and you’ll see the status bar in the top working.
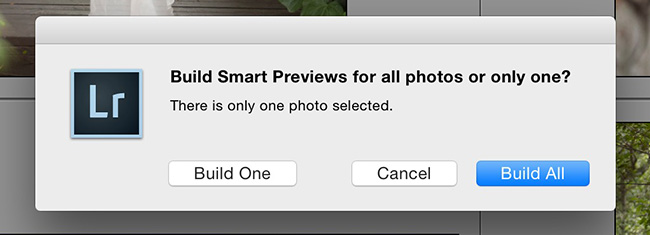
As a side note, Lightroom is smart enough to ask you if you’d like to generate previews for an entire folder of images if you only have one image selected. Just make sure you don’t accidentally click “Build All” if your current image folder has thousands of images in it, and you only actually meant to create a Smart Preview for one image!
Once Smart Previews have been rendered, you will see their status mentioned in the upper right of your Develop Module, right under the Histogram:
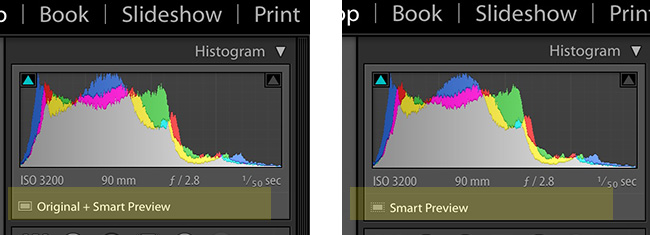
As I said before, Smart Previews in Lightroom were originally created so that you could edit your large raw images without having your external hard drive connected to your computer at all times. Of course, even though we now prefer to use them virtually all the time for our wedding photography post-production, they still work perfectly for things like traveling with a laptop when you’d rather leave your external hard drives at home!
Either way, creating and using Smart Previews is an easy process, one that I honestly believe could benefit every photographer. (Yes, even those of you that are reading this who are anxious to tell me about your new computer that is “a beast!” and never runs slow… Just wait until you upgrade your camera and have to work with double or triple the megapixels!)
It comes down to that example with the sand bags above. No matter how much memory (RAM) your computer has, or what chip (CPU) or how big of a hard drive (or SSD) you’re running, still, giving Lightroom smaller RAW files to work with that are only a small fraction of the size will most definitely speed things up!
The key to this system of using Smart Previews is to stay organized. Your original raw files don’t need to be moved around, you don’t need to rename folders manually anymore; Lightroom will remember where everything is! By the way, Smart Preview files themselves are stored in a “Smart Previews” folder that resides in the same folder as your .LRCAT catalog file, in case you’re wondering.
You still want to keep track of where those original files are at all times, especially if you’re using external hard drives. Make sure to have a backup (as you should always) of your original raw files; if you lose those, your Smart Previews will only be able to generate a JPG image that is 2000 pixels long/wide!
I hope this updated tip helps all of you work efficiently in Lightroom. It’s made the process much more enjoyable for me over the years, and I am confident it will do the same for you.
Leave a Reply
You must be logged in to post a comment.